
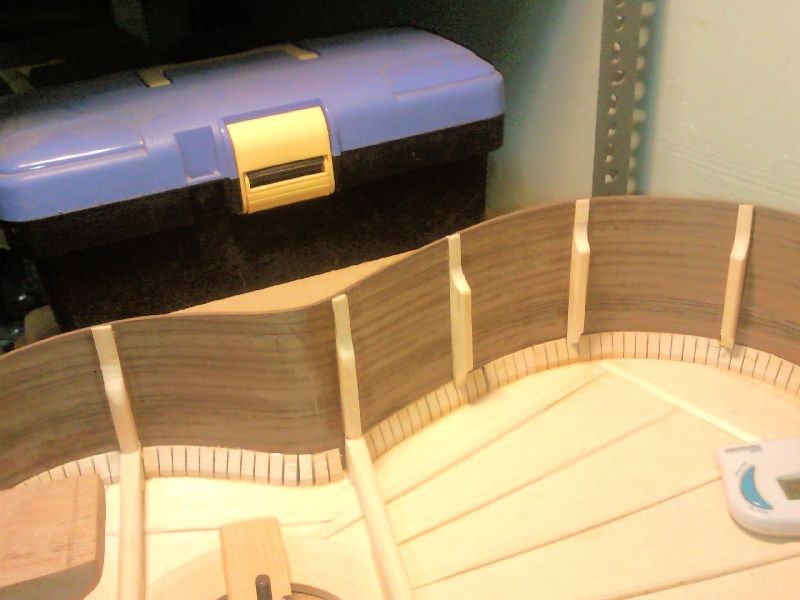
I have 5 on each side, 2 of them is there to support the UTB and LTB, and 3 more for the lower bout.
Well it's a bit overkill but after gluing the sides feels rigid.


When I was doing the notches in the reversed kerfed lining for the back, I made a terrible mistake.
I use the vanguard sheet to mark the position of the side struts
But I made a mistake the vanguard is outside the sides..
Due to the side curvature when transfer the markings to the linear lining, there is a position misplacement.
The notches are further apart...
Argh.. when fitted the lining only then I realise it... now I have wasted a good piece of lining material...

The curvature will cause enough discrepancy when notching..


Now gotta think what to do...
I discard that lining as there were too many notches in there.
But it didn't go wasted, I use is as reference for the notching correctly the next lining.
I used it for both sides and managed to get it done accurately.
The vanguard sheet on the inner circle also didn't work properly as there as some thickness in the side struts (2.5mm) which is enough to make the discrepancy.
This was why I used the 1st trial lining for reference.
It is able to go over the side struts and thus be able to mark the position accurately.


Have to worked fast as HHG gels pretty fast.
I used my hairdryer to heat it up a little.
When gluing I leave the lining abit proud of the sides to be shave away later and cater for the arc in the back.
The back is not perpendicular to the sides at the edges


2 comments:
Hello, I love reading through your blog, I wanted to leave a little comment to support you and wish you a good continuation. Wish you best of luck for all your best efforts. strut channel, shopping racks manufacturer.
Thanks! Working v hard to complete it. Looks like I am going to miss the X'mas deadline I set for myself...
Post a Comment