Custom Search
Showing posts with label Side. Show all posts

2022-03-20

Making the sides

Been quite a while since my last update so I shall continue to finish the journal of this build.
Next step is to continue the sides: thicknessing then bend.


Preparing the sides


Scraping the sides

Thicknessing

Tracing the outline from template

20220430
Preparing for the bending.
Mould and side bender prepared.


Preparing for the bending

Bend waist first check the bend against the mold

Clamp to the mold

Bending done

2021-12-25

Applying finish to the sides (French Polish)


20211225

Merry Christmas! Everyone!


So I continue with the FP of the sides.
The problem is with the holding of the guitar while the sides are being polished.
So I managed to come out with clamping in the vise, using 2 piece of wood as the caul.
It held quite sturdy and allows me to access from one of the sides to the back.
When I polish the other side, I will take out and flip the entire guitar over.
Once this is settled, I began to FP the sides; the process is essentially the same as the back.


Holding the guitar with vise.


FP the sides


Shine started to form


20220101

Happy New Year 2022! Everyone.


Hope this new year will be a great year for everyone.

So I continue to polish the side until satifactory.
Next will be the neck and head.


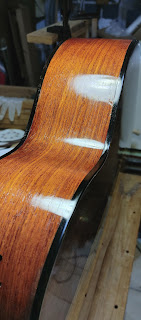
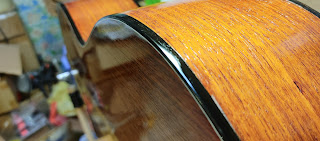
The shine on the sides are quite ok now.


Ebony binding looks nice under FP


The back finish is really good. Can see the reflection.


Can see the contrast between the polished surface and bare wood (in the sound port)


FInal looks


Final looks

2020-02-19

Making the sides


Making the sides

20191128
While waiting for some of the glues to dry, I began to thickness the sides.
At first I scraped one side smooth first.
This will be the outside sides with no knots visible
The other side with some some knots will be in the interior of the guitar.

Damn this wood is damn hard to plane, causing some tear out but luckily the stock is pretty thick so by the time I scrape them out the tear-out becomes level.
I switched to my high angle plane to prevent the tear-out and the HSS iron works wonder; remaining sharp after numerous planing.


Scraping the sides


Outer side of the sides scraped


Thicknessing the sides with HA plane


20200207
More thicknessing done on the 2 sides pieces.
Other than measuring the thickness by the thickness gauge, I also flex the piece.
When flexed the side piece has to be pretty flexible.


Both sides thicknessed


All the shavings...


20200219

Bending the Sides
After thicknessing, the next step will be to bend the sides.
Before bending I need to mark out roughly where the curvature points are.
i.e. which part is the waist which part is the upper bout etc...
Once marked I can start bending.

Recently I bought a properly bending iron.
The main difference is that it has a flatter curve portion on the iron as well as a tight curve portion.
This allows me to heat up more sides before attempting to bend.
This makes the bending job a lot easier and the bent sides are smoother in curvature.


Bending the sides


One side done


Both sides done


The bending set up - new side bending iron.

2015-07-05

Thickness the sides


I also thickness the maple sides for #8.
The sequence of thicknessing is scrub plane, my wooden plane and finally high angle plane.
After removing the initial layer of maple I can see the beautiful flame figure.
Maple does not really likes to be planed, I have to plane at an angle to avoid tearout.
But the HA plane is really doing a good job of levelling it smooth without tearout.


Straightening one side of the sides for the top facing edge.


Began planing. You can see the flame figure after removing the initial oxidized layer.


Sequence of planing Scrub -> Wooden Smoother -> HA plane


Done!


Look at the waste shavings / chips.


20150705
The sides are saw to size.
Some binding can be made from the cut-off of the sides.


Cutting off some excess from the sides. It can be used as bindings.


Cut-off done.

Thickness the sides


20150526
I began to thickness the sides.
Originally I plan to braced up the top but due the recent wet weather I decided to postpone that step.
Thicknessing the sides is pretty straight forward, I did it with these planes:
- scrub plane - remove main bulk of material in chips
- #5 jack plane - to smoothen the ridges form by the scrub
- HA smooth woodie - to further smoothen the surface.
If I follow this scheme of removal the thicknessing is pretty straight forward.
But it still takes a great deal of effort.
I was left panting all the way.
Guess I am really out of shape ... haha.


Plane one edge straight first (top edge)


Scrape the outside face smooth


Planing starts...


Look at the amount of waste produced...


Sides thickenessed. You can really feel that it's very pliable. Now it's ready to be bent.


20150529
Final smoothening of the surface before bending using scraper.
Also to ensure both sides are same thickness at the same point.
This is especially crucial at the butt or end block region.


Final smoothening using scraper and also ensure the 2 sides are same thickness at the same region especially at the end block region.


20150705
The sides are saw to size.
Some binding can be made from the cut-off of the sides.


Cutting off some excess from the sides. It can be used as bindings.


Sawing off the excess

2013-09-20

Bending the sides

I started to bend the sides, and to my surprise it's as easy as IRW.
I think it's probably because I thin the sides to teh correct thickness: 1.8mm at the waist and 2 at the rest.
The bending proceeded smoothly without any cracks.
The main thing to note is to allow the sides to absorb the heat before attempt to bend it.
The 2 wooden blocks which I use are very useful in supporting the bend and also to insulate the heat from my hand.
I didn't wear any gloves actually though it's a good practice to wear for protection.
And fortunately no burns this time round :)
After bending, I clamped the sides to the molds and leave it to settle in.


Preparing to bend


Checking the waist bend


Checking the LB


Clamp to mold


Done!


20130920
After the sides are in the mold, I saw off the excess ends.


Saw off the excess ends. The neck side still need to be sawn

2013-08-29

Thicknessing the sides

I had to rest a while as my R wrist was painful.
Signs of rheumatism?
I had sprained my wrist during my company's inter-department soccer game when I fell down a number of times.
Not that I am good at soccer though.
Ever since that game my wrist wasn't in good condition.
These few days the weather was very wet and hence the rheumatism sets in.

I began to thickness the sides.
With my arsenal of planes and planing cross-grain, it quite easy to bring down to thickness 2mm without any tearout.
I use both my woodies and western planes 2 jack planes one smoother cut one more aggressive.
But i do realise it's time to sharpen all the irons...


Straighten one edge (top edge)


Mark out the side points from my template


Began planing cross grain.


Smoothen it with scraper


Look at the mountain of shavings