
I simply saw at the line.
After that I trim the top to conform to the side profile.
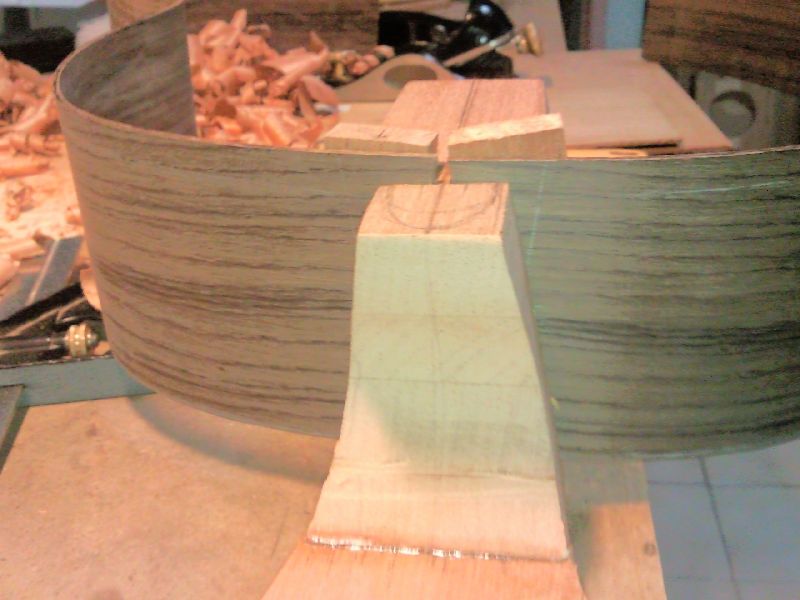
Also I cut the side to fit in the heel block.
At first I nearly mark the wrong direction.
But when I put into the solera, I discover the triangular shape orientation is wrong.
It really pays to be careful.
Normally the angle is measure from the bottom of the heel block
But in this case the heel block is blocked by the elevated neck extension.
So I had to measure from the top and hence the orientation error.
The right way up is the wider at nearer to the top and narrowed into the heel / back region.


and notice the shape orientation of the triangle is wrong.


The distance reference from edge by measuring the center width of the heel block and divide by 2. The width is 28mm and 1/2 of it is 14mm measure from the center.
The angle will touch the marked point.


The triangle shape orientation is correct.


Following that, I begin to make the actual wedge for the side slots into the heel.
I cut 2 pieces and then plane to fit.
Also I began to plane the end block.
I saw the end block blank into 2 halves and plane the thinner one.
My end block ended up about 10mm thick.
I am thinking it might not be sturdy enough.
Again I was checking the curve with the mould when I plane.


The wood is just as scrap but it works well for a plane stopper like a bench dog


Some asymmetry there.

Well I must start to think of the sequence of assembly.
With the elevated neck in place the assembly is slight tricky.
I must also decide whether to glue in the wedges or not or simply wedge in will do.
From what I knew, Romanillos only glue the other side of the wedge and not the wedge face that is in contact with the movable piece.
No comments:
Post a Comment