Custom Search
Showing posts with label Headplate. Show all posts

2022-03-07

Making the neck


20210814
Next is to make the neck, however for the head plate I will need to cut out the back to the plantilla outline.
For that, I used my usual coping saw to do the job.
Hard work? well kind of but it certainly works nicely: controlled and quiet.


Cutting the outline

1/2 way there

Outline cut


20210815
Next step is to prepare the headplate.
First I need to shoot the 2 cut-off straight for jointing.
For the jointing I just use 2 clamps to clamp it tight.
Once the jointed headplate is done, I cut to shape and glue to the head of the neck


Shooting the joint edges for the off-cut

Joint the 2 off-cut

Headplate prepared.

Check the fit

Glue the headplate

Headplate glued


20210828
Next I began to work on the head part of the neck, drilling the slots and the tuner holes.
After that I began to shape the head.
At first I was aiming for my new style similar to #11 (haha #11 was build before #10), but the owner prefer something more elaborate.
In the end I settle for a Bouchet style head stock.
It look elegant and have some nice curvess


Using the template as a guide and drill the 2 slot holes.
The template was the same as the #11

The drill bit wasnt long enough so need to remove the template.

Checking squareness

Cutting slots for remove excess materials from the sides

Alignment pins for ensuring the template aligns to the head.
This portion will be removed during the slots cutting part.

Drilling tuner holes.
One of the impt step is to drill the tuner holes before cutting the slot to ensure square alignment of holes.

Making sure the tuner can slot in correctly.
A lot of guitar that I have seen doesnt slot in properly because the hole wasn't drill square to the sides.

Tuner hole done. Can see the head shape drawn on the head.

Head shaped nicely.


20210908
Next part is to shape the slot.
I drilled a series of holes (smaller bit diameter than the slots hole).
Then I connect the holes using a coping saw.
The slot is shaped using chisels and finally files and sanding to make it smooth and straight.


Drilling a series of holes

Holes drilled

Removing the rest of the waste using chisels

Paring the waste away

Using chopping will reduce the blow out behind with a wood backing

Head done. (well almost) the lower curve transition to neck part has yet to be completed.


20211002
The next part is to work on the heel block.
In my build method, the heel block is build separately from main neck shaft.
Only after the assembly and bindings stage, then the neck is glued to the main body.
THis allows for an cleaner and easier binding process.
That said, it will be crucial that the heel block's geometry structure is compatible with the neck shaft.
So in the building of the heel block, aligning pins are used also.

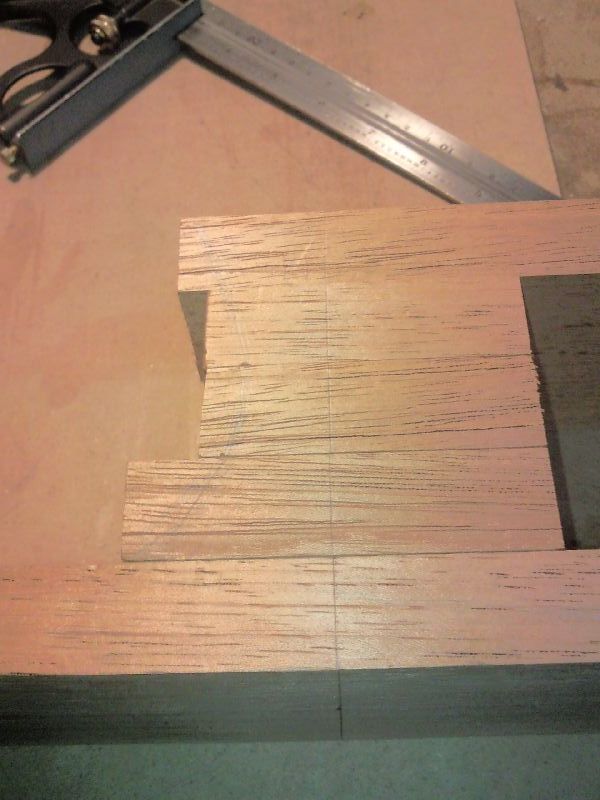
THe heel block has been glue previously so now is the time to cut the sides slot into the heel block.
To ensure the block is square to the sides, the heel block is placed in the solera with the correct angle and then mark with a square.
Next the slots are marked carefully and cut with a magnetic guide block with the correct angle.
Sides does not insert into the heel block perpendicularly but at an angle and hence the guide block.
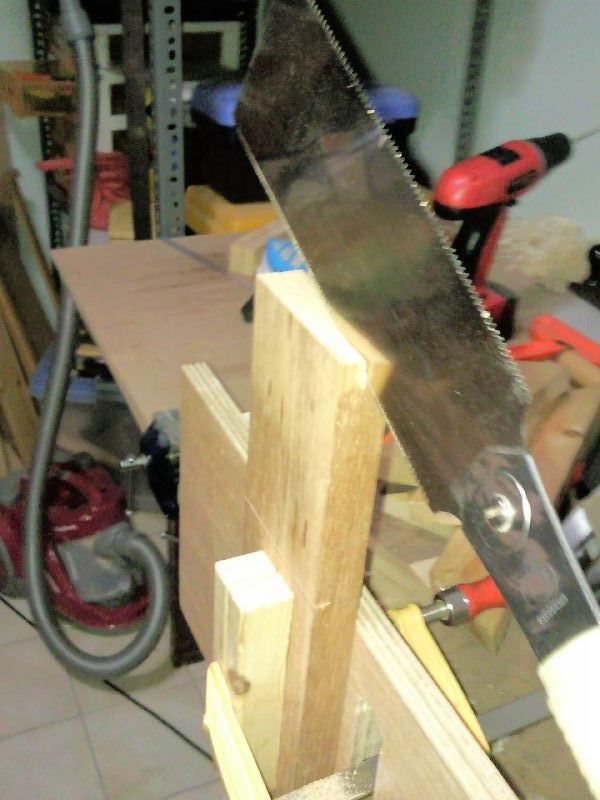
The slots are cut using a Japanese ryouba saw and with the guide block.
Waste are chisel out then.
The slots are not parallel but form a wedge shape for wedging the sides tight during assembly.


Marking the slot using the solera

Saw guide with magnets

Prepare to saw the slot for sides

Sawing the side slots

Chisel away the waste in between

Waste all chiselled

Side slot done

Heel block in solera


20211108
Still at the heel block part, next to do is to roughly shape the heel portion.
Need to saw away the heel part to make the shape into a triangle.
This will be last part of processing for the neck.
Subsequent part will be done after assembly.


Saw away the heel part waste

The other side

Side view

Done.

2011-09-02

Gluing the headplate / Making neck

I also glue up the headplate for the neck.
It was pretty easy with no fuss.
I just apply the HHG to the veneer one by one, and finally paste on the IRW (from back) on the veneer.
The only thing is have to work fast with the HHG, so I didn't have time to take more pictures.

But I did use up my batch of HHG and had to remix the glue.
I didn't weigh the HHG but instead remember the viscosity of the fluid when I mixed it.

Applying HHG

More HHG

Gluing the Headplate

Clamping it

Mixing HHG

Checking the crystal dissolving in the hot water

There was some gaps so I apply more HHG and clamp tighter

Gaps closed and the excess headplate / veneer leveled.

Planing the excess veneer/headplate

Leveled

Next is to cut the excess part from the end of the headplate so that it can support the nut.
Because the head is at an angle (15 deg) to the neck, we need to make the slot vertically down perpendicular to the neck.
So I plane a support block using the head and shooting board method.
I put some scrap wood to protect the neck.

Finally when it's down I use my ryoba saw and started sawing the protruding headplate and veneer.
Finally I clean up with a chisel and sanding block
Looks good.

Marking the starting of the nut.

Marking using white color pencil

Shoot / Plane the support block to correct angle

Aligning the support block to the line drawn.

Starting sawing. (pic is abit blur)

Sawing the headplate 1/2 way

Sawing the veneer

Cut and clean up with chisel and sandpaper.

Next I proceed on with the neck making.
I measure the 12 fret marking with 5mm for the nut and 325mm for the 12 fret mark.
This is a 650 (1/2 of it is 325) scale length guitar.
Marking the 12 fret

12 fret mark 325mm from nut space

Nut allowance 5mm

Then I add another 125mm for the elevated neck and cut off the excess
I use another neck blank for the stack heel.
I square shoot the end grain of the cut blocks.
and prepare the block for gluing.

Cutting the excess

Cut!

All blocks cut

Aligning the blocks

Drawing the 12 fret line and curve of the heel

I proceed to cut the slope on the neck for the elevated neck part.
After removing my sawing, I plane the rest of the neck to be almost flush with the solera.
A bit of fitting more to go.

Cutting the slot with a block (hidden) as a guide.

Sawing the excess part.

The slope sawn.

Planing using a shoulder plane so that I can reach all the way into the edge.

Close up view.

The main bulk is done using block plane

Almost done. You can see the pencil line there is some more allowance to go for fitting.

To fit into the solera I need to cut the wings of the elevated part of the neck.
Conventional fingerboard is < 65mm (62mm at the 12th fret) for this part I set width at 69mm for some allowance. I also have to cut the protruding part of the solera at the 12th fret. After cutting and fitting into the solera I check the slope of the elevated fingerboard part. My blank was definitely higher: So I have a choice of lowering it to fit the solera or add another part into the solera. I am tending toward the latter as I think a higher elevated fingerboard would be easier to play. Point to consider is also the slope of the doming of the topboard that will be forced by the elevated fingerboard.

Sawing the wings off. I have to becareful as sawing along grain can easily cause splitting.
As a safeguard I cut the crossgrain cut at the 12 fret to prevent over splitting in case it happens

Done
Trimming ends at 12th fret

Trimming the width with chisel

Cutting the solera at the 12th fret

Fitted neck into the solera

Now the dilemma: fit the solera to the neck or neck to solera?

Well I solve the dilema, just raise the solera.
I feel that a too low raise fingerboard would not be effective (might as well do without).
My current neck blank's angle and height is just nice.
So I would rather the solera fit the neck blank.

Anyway I use a scrap piece of wood mark the excess angle and plane it down.
Next I glue it to the solera.
After that I glue the heel block.
The slots would need to be cut before I glue the heel block to the neck.

Planing the addition piece of wood

Gluing it to the solera

Preparing to glue the heel block

Glued. With HHG I don't have much to time to take the in between pics

As a treat this is roughly how the elevated neck will look like.

After removing the clamps

I level the additional 2 blocks to fit the neck blank.

With the heel block

Next to cut the slots in the heel block

For that I will be using my neck jig that will have a angle in the slot as defined by the jig.
The side do not join the heel block in a 90 degree but at a slight angle probably around 89 or 88 degree

I square the heel block roughly and marked out the center lines of the block.
This will be align to the neck later on.
The center line is also required for symmetry purposes.

I discover that it's impossible to clamp the heel block.
So I need to glue a scrap piece of wood to the heel block in order to cut the slots.
I glued it with 4 drops of PVA white glue; just enough to hold the block and need to remove the scrap after that.
In a normal neck I just clamp to the neck part but in this elevated fingerboard neck, I cut the heel block separately from the neck.
This cause the problem of not enough places to clamp the heel block.
The next time I can cut bottom most piece longer enough for me to clamp the heel block.
After sawing the slots I can cut the excess away for another heel block.

Squaring the heel block

Gluing a scrap piece to the wood for clamping purpose

After that I began to mark the slot.
The jig has a proble: it was not square...
I had to put a wedge to correct the angle.
Then I began sawing.
I didn't have a physical stop for me to stop sawing but use my eyes to check the sawing mark.
Once I hit the mark I will stop sawing.
Once completed I realised the angle for both sides isn't the same...
That is the problem of a poorly made jig... Think I need to rework on it.
Anyway I began sawing the back slot with a slight taper for the wedging effect.
And chisel out the in between.

Ready to saw the slot.

Marking on the heel block

Sawing the slot

Another view.

The heel block slot sawn, note the slight taper for the wedging effect of the 2nd slot?

The angle for the 2 sides isn't symmetrical need to correct that later.

Chiseling the slot

Sawing the back of the heel block

Planing it level.

Heel block with the neck.

With the top in place. Note the wedge for the top to wedge the top in between the neck.

Another view

Close up.