The guitar #11 is done after some polishing and here is a recording of the sample.
The guitar has great clarity with sparking trebles.
Unfortunately, I didn't record too many audio / video samples.
A video playing Barrio's Aconquija which clearly shows the clarity of the trebles.
There is also great sustain and harmonics in the sound too!
No reverb or any sound processing was done on the recording, which was recorded with my LG V60 phone.
Here is another one comparing 3 guitars.
My #1 (in the white still), My #11 and Alex's #23 (Alexandru Marian) kindly on loan to me thanks to the owner, Reza who is a great guitarist.
Recording was also done with my LG V60 phone.
 Custom Search
Showing posts with label Guitar #11. Show all posts
Showing posts with label Guitar #11. Show all posts
2022-03-05

2021-12-25
Applying finish to the sides (French Polish)
20211225
Merry Christmas! Everyone!
So I continue with the FP of the sides.
The problem is with the holding of the guitar while the sides are being polished.
So I managed to come out with clamping in the vise, using 2 piece of wood as the caul.
It held quite sturdy and allows me to access from one of the sides to the back.
When I polish the other side, I will take out and flip the entire guitar over.
Once this is settled, I began to FP the sides; the process is essentially the same as the back.

Holding the guitar with vise.

FP the sides

Shine started to form
20220101
Happy New Year 2022! Everyone.
Hope this new year will be a great year for everyone.
So I continue to polish the side until satifactory.
Next will be the neck and head.
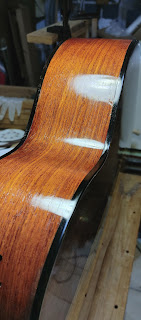
The shine on the sides are quite ok now.
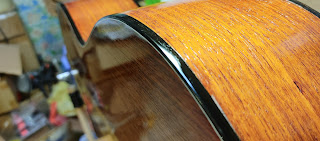
Ebony binding looks nice under FP

The back finish is really good. Can see the reflection.

Can see the contrast between the polished surface and bare wood (in the sound port)

FInal looks

Final looks
2021-12-22
Applying finish to back (French Polish)
20211218
Next will be the back.
So the same procedure: surface preparation (sanding), bodying (accumulating the finish), polish (for making it shine), spiriting off burnishing (compact the finish).
The last step will be burnishing the polish to compact and make the back shine.
The back was sanded in increasing grits: 80 120 240 320 400 800 1000.
At the last grit you can see the back surface started to show a abit of shine under the reflection.
Once that is done, I can start to the next process of bodying.
For the back during the polish stage I use pumice to fill in the pores.
Normally for some other process, the pore is filled first using epoxy resing such as zpoxy.
However, I just use the traditional method of pumice instead.
The effect works just fine.
Due to the surface being flat without hindrance polishing the back was much easier.

Sanding the back surface.

Can see the faint shine already

Another angle of the surface

Bodying

Polishing, can see the pores

After some pore filling using pumice
20211222
The process continues until the level of shine is achieved.
After one round of polishing, I apply oil and sand with 400 grit lightly to level the surface even.
THen continue to polish.

Before level sanding the surface

Level sanding with 400 grit and oil

Level sanding
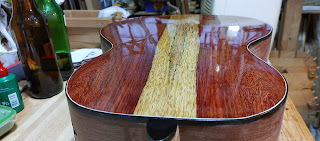
Much better after level sanding, Continue polishing to shine

Good shine.
2021-12-04
Applying finish to top (French Polish)
20211016
I began to sand the top for the finish.
Basically how good the result of the finish will be determined by the surface preparation.
Before that I also repair he rosette which had part of the tiles torn out during the planing of the rosette to level with the top.

Repairing the rosette

Repairing the rosette
20211020
Then I began to body the shellac onto the top.
After sometime in the bodying of the shellac, I started to polish.
I use some mineral (non-drying) oil for the lubricant

After sanding the top

Achieve some shine when I started polishing
20211027
As I continue the polishing I noticed some surface weren't as leveled as I had wished.
The uneven surface is quite prominent under the finish.
So I must decide to carry on or to redo the finish.
So I chose the latter and began to sand down the shellac.
Boy, the shellac sure gum up the sand paper easily.
I had a hard time sanding to bare wood.

Imperfections in the surface.

After sanding the surface

After sanding the surface
20211113
Next back to restart the bodying then polishing of the top.
I also took the opportunity to fill the rosette pores with epoxy.
This to have a better even surface on the rosette.

Achieve the shine a little by little

Lower bout

Rosette area

The medullary grains looks much better under shellac

Shine forming
2021204
The final shine was done after a few weeks of polishing.
Not perfect but still ok.
The top was harder to polish due to the presence of the bridge
However, I chose to glue the bridge first for sound tuning purpose before finishing.
So the finish quality had to be compromised a bit for the sake of the sound quality.

Checking the reflection

Getting better

Checking the shine reflection

Acceptable shine
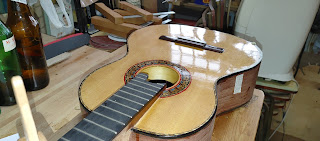
Final shine!
2021-10-03
Making the inlay
20210821
One of the new things that I tried, is making a epoxy filled inlay.
The procedure is actually quite easy, just route the cavity and fill the cavity with epoxy resin.
I use lampblack to dye the epoxy black.
The only problem is getting the cavity look right.
So I tried on a test piece on the technique.
It came out pretty decent.

Template for routing

After routing the cavity

Filled with epoxy

After sanding looks ok.
20210918
Once the test piece is ok, I began to work on the actual inlay piece.
This inlay will be glued to the headstock part, customised for the owner of the guitar.
The template is similar to the test piece but slightly more complicated.
To route the cavity I use my B&D RTX to route.
After that I followed with chisel and marking knife to make the edges more distinct.
Then the rest of the procedure is the same.

After routing the cavity

Mixed the resin with lampblack

Filled the cavity

Sanding flat

Final cut out.
20210925-20211003
Following that I surround the borders with purfling and binding similar to the rosette theme.
Red purfling with black binding.
After glue dried, I trim the ends to size.

Gluing the red purfling

Surrounding the red purfling with black binding

Using vice to clamp

Final shape but havent trim the ends yet.

All trimmed to size, checking the layout on the headstock
Subscribe to:
Posts (Atom)