
20180827
I also began to make the neck first by squaring the blank.
Squaring the blank will make marking the dimensions much easier.
Also I tried to plan the length so as to optimised the material used.
These necks will be elevated design so they are longer than usually.

Squaring the blank

Marking the dimensions
20190116
I saw the scarf joint and clean the joint up with block plane.
Before that I clamp a guide block to ensure that the saw is tracking properly.
Then I just need to make sure the saw stick to the guide block.
If the sawing is good the clean up is minimal.
During clean up I just need to ensure that the surface are straight and aligned.

Clamp the guide block

Saw the scarf based on the guide block

Clean up the scarf joint afterwards.

After cleaning the scarf

Prepare to glue the neck and head

Glued

Both necks done. 2nd neck was done similarly
20190211
I made a new head template for the new guitar.
Basically mirroring 2 pieces then join them together.
It has straighter curves more inspired by Simplicio style of head which is easier for carving too.

Making a new head template
20190220
I jointed the cut-off from the back to form the headplate.

Shooting the edges for jointing

Preparing to joint

Glued
20190301
Glued the headplate to the head.

Headplate glued to the head
20190307
Trimmed the headplated.

Sawing the excess headplate

Trim to size using block plane

Ready to shape the head
20190308
Shaping the head. The head was shaped using block planes and saws and files.

Drillin the slot holes

Shaping the head

Side flushed with the template. Note that the template is supported by aligning dowels
20190319

Shaping the head with file

... with saw

Head shaped.
20190322
The tuner holes are drilled next.
I have the jig from LMI to guide the drill bit.
Just need to make sure the holes are aligned properly for the 2 sides.
I draw a centre line and extend the 3 lines and use a square on the other side to align the intersection with the centre line.

Drilling the tuner holes with the tuner guide.

Holes drilled
20190326
Next I saw away the excess headplate at the fingerboard end.
I had to make sure that the headplate is square to the fingerboard surface.
To do that I use the guide block to saw.
After sawing, I clean up with my chisel.

Saw the excess headplate with a guide block.

Clean up with chisel.
Next I drill away the waste in the tuner slots.
I use a smaller forstner bit than the one at the start and end of the slot.

Drill away the waste in the tuner slot.

Majority of the waste drilled away.

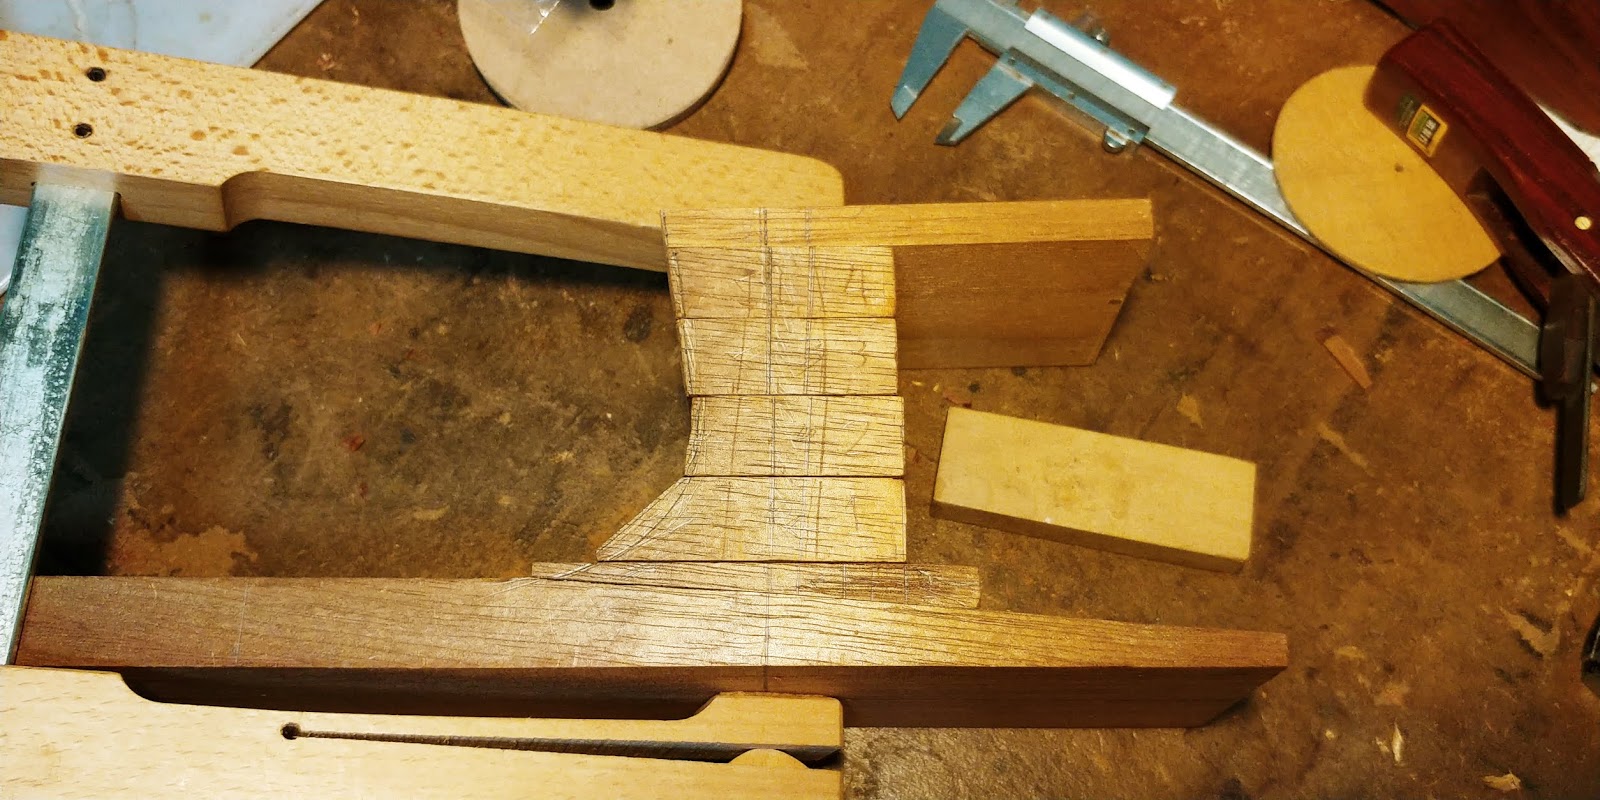
Excess neck was cut from the main neck. The excess portion will form the stacked heel block.
20190328
Next I chisel away the waste the tuner slot.
The final sanding still needs to be done though.
I also cut the heel block making sure the grain alignment is the same as the neck.
This will ensure that during the carving stage will be easier.

Chisel the waste

Mostly chiseled away. Rest will be straighten by sanding.

Stacked heel blocks cut to size
20190408
I clean up the slot by filing and sanding.
Next I cut away the piece for the elevated fingerboard portion.

Clean up the head slots

Stacked heel with the final foot piece.

Sawing the elevated fingerboard part of the wood form the main neck shaft

Cleaning up the surface

Stacked heel properly aligned
Stacked heel pieces saws to size.
20190508

Stacked heel pieces glued. Only the middle portion were glued first in order to facilitate easier planing of the straight back area

Back of the heel planed nicely
20190806
The foot piece was gluedto the heel block.

Glued the foot piece to the heel stack