
20150113
I was asked by my friend's teacher to duplicate a bridge for a Selmer guitar.
I did it in between the session and sometimes in my office.
It was a good experience.
The hardest part was transferring the intonation adjustment onto the new bridge.
The bridge itself was made of wood. (Haha what am I saying... I meant to say the bridge was made of wood entirely without bone or other things.)
Perhaps the easiest way was to use an CNC machine to do it but I didn't have one :)
So after thinking over a period of time, I finally decided how to go about doing it.
The action is to be set higher than the current one; and that's the main purpose why a new bridge was needed.
I use MadRW for the bridge because MadRW has a lower damping than the original IRW.
The size was easily duplicated and again I cut the length slightly longer.
For the height I put a scraper below the orignal bridge as I trace the outline onto the blank.
This will raise the action.
After that the usual sawing to size.
For the 2 curve at the ends, chisels and saw are used.
Now to transfer the intonation markings I first transfer to a piece of spruce and then use the spruce to transfer back.
At first I thought carving the spruce but in the end the spruce just too soft to transfer back.
So I simply measure the marking and transfer back by measure against the square edge.
If I transfer directly it will be mirror image so I need an intermediate medium to reverse out the mirror image effect.
Carving was done by chiseling.
For the base I just use scraper to roughly shape the base.
After that I brought to fit with the guitar and adjsut the intonation.
The base fitting wasn't good and so I transfer the original bridge's bottom to the same marking spruce and use that to shape the bottom of the new bridge.
I could have use the original top for shaping but I need to completely remove the string.
And the dust generated could dirty the top.
So I just use a spare piece of wood instead.
After shaping the fitting was very good.
I notch the top with my nut file
The final weight was very similar about 17.xg vs the orginal 18g.
So all in all the tone should not differ too much.
I took the opportunity to use my scope and see what's inside the guitar.

Pin the bridge against a square edge and then Transferring the marking onto the spruce piece.
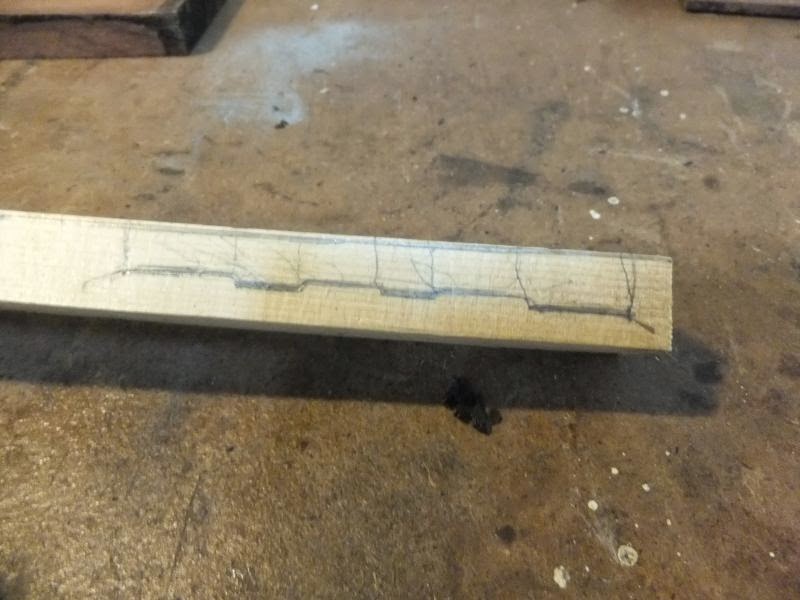
Intonation marking marked onto the spruce (mirror image)

Marking the blank

Saw to size

Carving out the marking but it didn't turn out too well.

Trace the marking (from the edge) and scribing onto the blank instead.

Trace the outline

Shape the bridge

Carve the intonation adjustment

Shaping the sanding mold. The curve is drawn from the original bridge.

Check the fitting against the old bridge

Checking fitting after sawing to size.

Initial sanding.

The scope

Examining inside of the guitar

The output is from my handphone

Sanding more at my workshop. I use the vacuum to suck up all the clogging dust. So it was much faster

The final weight 17.1g

Original weight is 18.4g

New and original bridge

Final fitting looks good.

View from the side.

Close up

Front view

Top view
Now for some interior view which was capture by the scope software.


No comments:
Post a Comment