
20140202
Well I started by selecting the neck blank.
I had some light cedar wood but I felt I would choose a slightly denser material for the strength.
It is important since the neck will tend to warp for those super light cedar.
After selecting the wood pieces, I square up the blank and prepare for the scarf cut

Squaring up the side edges.

Using the temporary shooting board
20140203
I proceed to cut the scarf joint after marking out the piece.
The head angle will be 15 degrees like my other heads.
This part will be for the head piece of both neck (#7 and #8)
This is because the length of the neck blank is not long enough.
Now I only make a neck which will extend to the soundhole, supporting the portion of the fingerboard between the heel and the soundhole.
This design has 2 purpose:
- The crack prevention
- Treble
In the unfortunate event of the top cracking, the neck will lend good structural support to the top.
There is no need to do a cleat on the top.
The region just beside the fingerboard at the two side of the fingerboard on the top is very prone to cracking due to the uneven expansion rate due to RH changes of the fingerboard (especially ebony fingerboard) when compare to the top.
Also having a thick support below the fingerboard region will give the treble a better responses for those high fret region.
Those elevated fingerboard will already have this build-in by default.
But normal neck won't so there neck/heel need to extend below the top to lend support.
After cutting the scarf, I clean up using plane.
I use my mini douzuki saw to start the sawing and followed by my big douzuki.
After to cut all the way thru' I use the ryouba saw.
After the cut, I clean up with plane and check for the straightness.
Now to cut the stack heel part.

Marking out the scarf using a head angle of 15 degrees. (Why 15 degrees? I don't know I just like that number.)

Clamp a guide block the neck blank and starting the cut using the mini douzuki saw

Sawing in progress... This is the full size douzuki.

Cleaning up using plane

Check for straighness and squareness

2 necks ready.
20140213
An early Happy Valentine's Day to all.
Well I continue on the neck.
Then I cut the extra length from the tail end
#7 is internal so the length is about 51 cm
#8 is external (elevated) so the length is about 53 cm; it has to exceed the sound hole by a bit.
Following that, I square the sides of the neck blank.
This side will be used for gluing the center strip.
Then I proceed to saw the neck blanks into halves.
I will include a ebony center strip for #8 and MadRW strip for #7.
Originally I was thinking of using EIR for #7 but it's not long enough so I have to use a fingerboard for it.
Kind of wasteful but I can always buy more fingerboard.
I think next time I will be getting more ABW for the fingerboard. (undecided as yet)
The ryoba is really good for ripping into halves... :)
After sawing I clean up using plane and also check for the jointing (gluing side) surface gaps.
It's a bit like jointing but not so crucial as there are more gluing surface.
But still I make sure no light passes thru'

Saw off the excess

Squaring the blank

Start the saw by using the mini douzuki saw.

Rip using the ryouba saw.

Done ripping.

Checking the jointing line.
20140218
I spent some time sharpening my plane irons and chisels last week.
Today I spend some refitting the irons and adjust the iron
I tested it out on test wood and they all worked great!
Nothing like a freshing sharpened tool!
Originally I had planned to glue up the main neck shaft but decided against it.
It looked like it's going to rain.
Anyway I shooted straight the edge for center neck spine: ebony and IRW
I found a lighter IRW for the neck instead of the MadRW
I also ripped the IRW blank into 1/2s for use of another neck.
As for the ebony strip I ripped it near the glue neck thickness.
Now they are ready for gluing.

Shooting straight one of the edge of the IRW strip

Doing the same for the ebony strip

Saw away the excess. The other piece can be used for another neck.

Similarly for the ebony

All set to be glued up.
20140224
I began to glue up the neck blanks.
I had a piece of pine with waxed paper glued on one surface and I use that to glue up the 2 neck blank.
It also served to align the 3 piece neck together on the same plane.
The pine is long enough to glue up 2 necks and I used up all my F-clamps in the process.
(Well actually I had another bunch of big F-clamps which I have not touched.)

Applying the hide glue and heat it up before gluing.

One neck done clamping.

Gluing up the other neck

Both done. You can see the impressive set of clamps haha. Anyway it weighs a ton.
20140226
I remove the clamp and check the gluing.
All seems ok except for one end where the center hardwood strip is slightly misaligned.
But it can plane away to become level nicely again which is I have done.
The excess protruding side of the center hardwood for both neck shaft is leveled nicely.
Now the 2 neck blank is ready for the gluing of scarf joint at the head.

Clamps removed

Planing the rosewood strip neck

Planing the ebony strip neck

Both neck ready for scarf joint gluing of the head.
20140318
I continued on making the neck by gluing the scarf joint.
However during the dry run before I glue, I discover there is no way to clamp it properly.
If I didn't saw the scarf angle (15 deg) on the main neck shaft, the protruding part will not allow a block to clamp.
So I did just that and saw away the excess part on the main shaft.
The cleaning up of the scarf took a while, longer than I expected actually.
Before I glue I did a dry run and use a space to elevate the head piece to the correct height.
Due to the central ebony/RW strip, the neck shaft is wider than the head.
For RW neck,I use my 3mm thick Al bar as spacer and ebony neck I use 2 scraper, (1mm + 0.6mm thick) as the spacer.
The rest is per normal:
1) Clamp the main shaft on the waxed paper wood support.
2) Apply hide glue
3) Clamp the scarf joint using 2 blocks
4) Clamp the head piece to support wood.
My support piece was quite long so I used it for both necks.
After that I use the cut-off from the backs to make the headplate.
I shoot the joint edge and jointed them.
For the maple back I choose the part with a good flame so that it looked better.
If I just joint using the most efficient way, I can yield 2 headplate but it will look ugly as there wasn't visible flame on the very outer edge.
Now once they are ready I can glue to the head and start to carve the head.

Plane the head to correct thickness.

Checking the thickness

Sawing away the excess part on the main neck shaft.

Correcting the scarf angle

RW neck ready for gluing

Ebony neck ready for gluing

Apply glue

Clamp

Both neck clamped
After some time I remove the clamps.

Neck to head scarf done.

Saw away the curved part as I chose the inner edge for jointing to get a good flame figure on the headplate.

Check the shape

Shoot the jointing edge

Done shooting.

Glue and clamped.

Preparing to glue for the other headplate.

Applying hide glue.
20140407
I continued on the necks.
First I glued on the headplate.
After the glued has dried significantly.
I first trim off the excess headplate
Next I gouge out a section of the neck to head joint in order to plane the taper on the headstock shape.
After shaping the sloping head, I drill the 4 end holes for the slots with the help of my template.
Next I saw off the excess head portion.

Apply glue to headplate

Glued and clamped

Trim the excess edge of the head plate

Apply glue to head plate

Glued and clamped
Drill 4 holes for the slot

Saw way the excess head

Plane the side of the head to shape
Saw away excess head

Saw away a section near the head and neck joint. This is to make it possible to plane the sloping sides for the head.

Head 1/2 way done. The other neck is the neck for #4.
20140509
It's a been a while since I last worked on these 2 guitars.
While I think of how to continue the #5's binding and purfling, I did a few work on the necks of these 2 guitars.
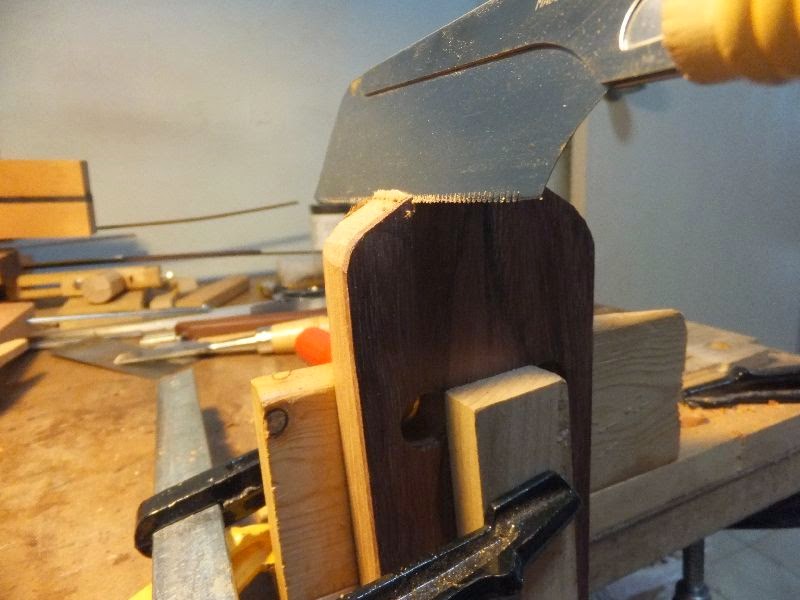
I drilled the tuner holes, shape the head and start to work on the binding of the head for #8.
For shaping the head, I had a template so I just need trace the shape onto the head and start to carve using my chisel and rebate plane.
I scribed the back a bit with marking knife to prevent tear out as I chisel the shape
In the other neck I use the template to chope the shape but the hardwood headplate is a little hard to chop compare to the cedar.
In the end I start to scribe and chisel the binding channel for #8.
This is also my first time doing a head binding.
I cheated a little using the LMI man made veneer instead of ebony binding which would be hard to bend around such tight corners in the Torres tombstone head shape.

Shaping using chisel.

Shaping using rebate plane

#8 head done.
Saw away the excess

After sawing

Scribing the back to prevent tearout

Chopping using template as guide.

Both neck head shape done.
I also drilled the tuner holes using the tuner jig.
With the jig it is quite easy.

Drilling the tuner holes.

With the tuner in place

With the tuner.
After that I use a guide block and saw away the excess headplate at the nut position.
I had to adjust the guide block a little.

Adjusting the angle of the guide block

Sawing away the excess headplate

Done!
I also began to cut the rebate for the binding for the head.
It's my first attempt in doing the head binding.
But it's basically the same idea as binding and purfling.

Scribing the channel

Chisel the waste

The curve part is the hardest to scribe and chisel.

Test and see the effect, looks good.

Routing the main center strip. I decide on a wedge shape instead.
20140515
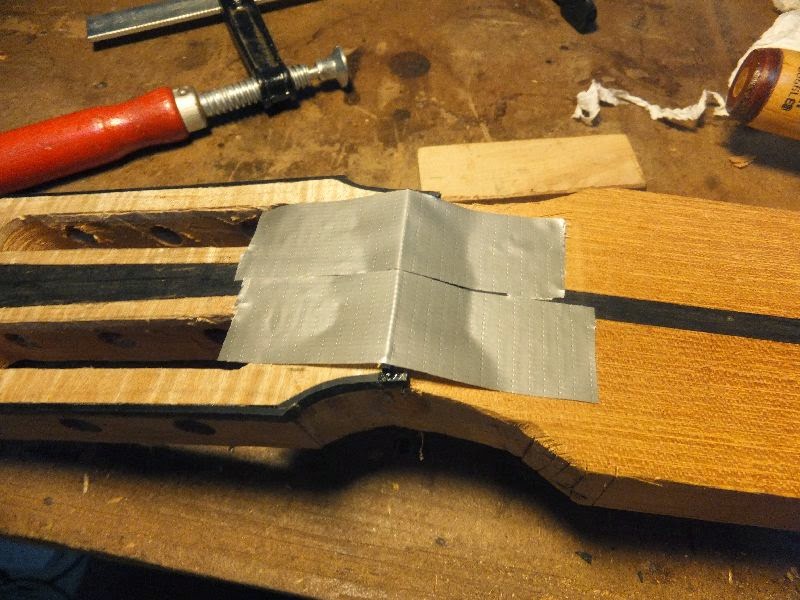
I inlay a center wedge of ebony in the middle of the head plate.
The ebony piece was prepared using shooting method.
After glueing I recut the rebate at the head part.
And then I also started gluing in the binding.
The tape didn't really hold the binding very well so I have some gaps.
I also cut the curve part at the neck head joint part.

Round off the neck / head joint part with a sander

Cutting the binding channel

Starting to glue the binding

Looks ok from far :)

Gluing the last few parts.
20140612
Today's is the 100th birthday of the one of the Go genius Go Seigen sensei.
Happy birthday to the Great Maestro!
Anyway I trim down the binding for the headstock and all looks well.
I use chisel to trim down until it's near the head plate and level it with the block plane.
Now I only left the last piece of the binding, the part near the nut

Leveling using block plane

Almost done!
20140616
Next I drill away the the tuner slots waste portion and chisel it to flush.
I use my newly bought small drill press.
When turned at highest speed it can drill properly.
Any lower rpm it won't have enough torque to drill the waste.
For #8 neck I also glued in the final piece of the binding.
And also trim the edges that protruded in the miter joint.

Drill away the waste

Tuner slot waste drilled.

Chisel the waste to the edge

Chiseling done.

Trim the miter
Glue the final piece of the binding.

Here's the completed head for the #8.
Looks pretty good for me, I must say.
I just need some sanding that's all.
20141201
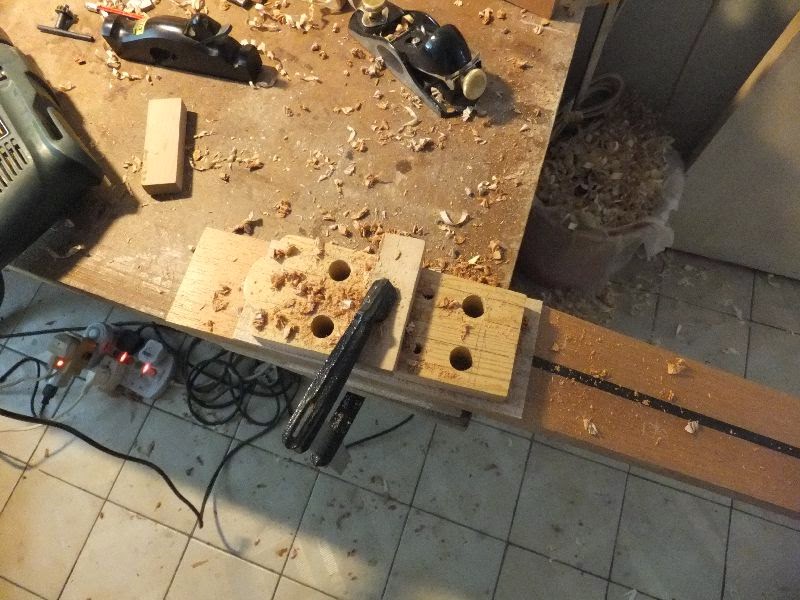
I continue the make the heel block for the 2 necks.
The neck blank is measured and cut to size.
For the foot block, the 2 wedge are cut from this block.
Normally the foot does not need to be so wide.
After the alignment holes are drilled they will be ready for gluing.

Cutting up the stack heel blocks

Sawing the wedges from the foot block

The 2 wedges sawn.

All stacked nicely and alignment marked.

All the 3 necks in progress. The #9 neck is slightly slower in progress since it was started at a later time.
20141211
I glued up the stack heel blocks.
Before that I drill alignment holes for the block to the neck shaft.
I had previously marked out all the centre lines and the 12th fret line
After I applied the hide I rubbed out the joint to prevent it from moving around too much before applying the clamp.

Drill the alignment holes

Prepare to glue

Applied hide glue

Rubbed joint for 1st 2 stack heel

Final clamping after the foot is on.
20141212
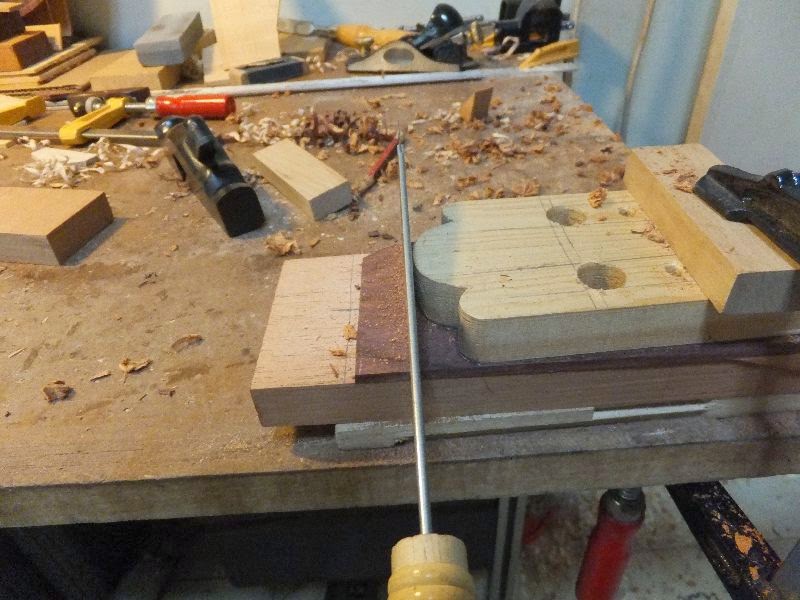
I cut the alignment wood pin for the stack heel to neck.
I sanded the part where the pin goes into the stack heel so it will be looser there.
The pin will stuck on the neck rather than the heel.
After that I began to cut the side slots for the heel and neck.
I only had time for #8 (Maple neck).
I just clamp the 2 parts together while I cut the slots.
After that I chisel away the slot.
I have a guide block to start the cut with a dozuki.
After that I continue with my ryouba saw.
Before cutting I sharpened the ryouba with my saw file
Now another neck to go; 2 if I add in #9's neck too.

Cut and prepare the alignment wood pin.

Both neck ready for side slot cutting.

Preparing to cut the side slot

Sawing the side slot with douzki saw first followed by ryouba saw.

Both slots cut

Chisel away the waste

All done.
20150108
I realised I cut the wedges slot wrongly for the #8 neck.
The wider part should be at the heel not the neck part.
I did the opposite...
Anyway to correct the mistake I just need to widen the slot
Luckily there is enough "meat" in the heel block.
The only problem I need re-cut the wedge material from another stock.
So I align the guide block and saw a chisel accordingly.
After that I shape the heel block abit.
Now that the heel wasn't attached to the neck I am able to shape it quite easily. :)

Do you know what's wrong with this? :)
Answer: The wedge direction is wrong...

Align the guide block to widen the slot with correct wedge direction and saw away the waste.

Chisel away the waste

View from the neck side. Still some chiseling required to smoothen the channel

All done.

Saw away the waste in the heel

Plane smooth

Plane the back part of the heel.

All the 3 necks

Materials for the 3 build.

#8 material (top neck back)

#7 material (top neck back)
No comments:
Post a Comment