
20130520
I continue on the neck.
Saw the fret slots on the IRW fret board, then shape the under side of the fretboard such that the bass side is lower than the treble side.
This will make the saddle more or less even in height.
This guitar will have 23 frets (top D).
Then I glue the fingerboard to the neck and plane the excess neck away.
It's still very heavy.

Sawing the fret slots

Done.

Saw away the sound hole part

Drill pilot holes for the fretboard

Gluing the fretboard using hide glue.

Clamped

Planing away the excess neck.

How the completed guitar would look

Side view
20130523
Next I began to thin the neck and rough shape the contour.
My new spoveshave is very useful as it can reach inner the bigger size Stanley.
But the Stanley is better are removing bulk of the neck first
For hard to reach area, I use chisel instead.
With the neck so free it's easier and faster to shape.

Shaping the neck with the new MJF spokeshave. This spokeshave is small profile and can reach hard to reach places.

Shaping the neck with the Stanley spokeshave. This is better for bulk removal.
20130618
I scrape the neck smoother.
Then I level the fretboard with some sandpaper.
I think there's some back bow introduced by the gluing.
Initially I had planned to fret it before gluing to the main body and heel, but after some thoughts I decided to glue it now before fretting.
As I check the neck angle, I found that it was wrong
The string height was 16 mm at the bridge location.
To correct the neck angle, I plane the elevated neck part with my block plane and re-check the neck angle.
Now it's correct at 10mm.
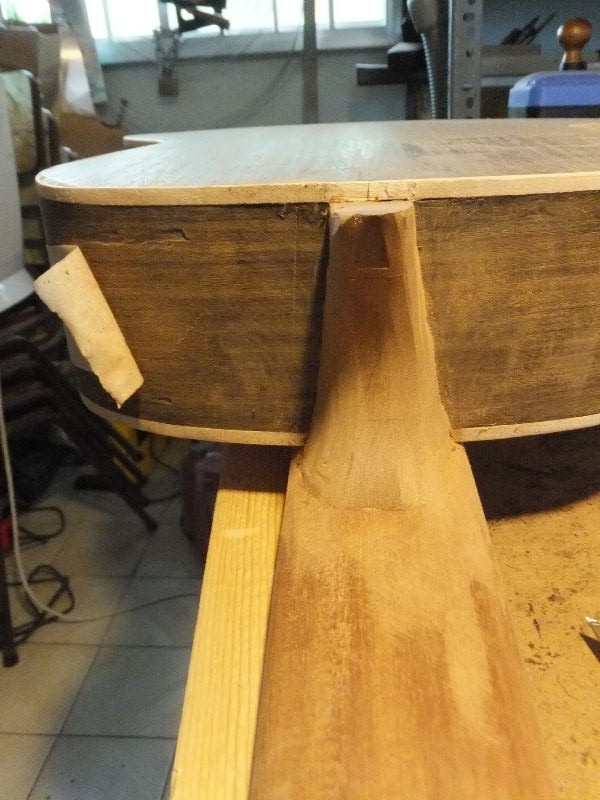
Then I proceed to glue the neck to the main body.
One reason is I want to ensure the neck angle is correct, and fretting in the body isn't exactly too difficult to do.
Secondly I'd like to carve the heel nicely now rather than wait to last minute.

Correcting the neck angle by planing off the elevated neck part.

Checking the neck angle

Apply glue

Glue to body and clamped
20130624
After the neck is glued to the main body, I can now carved the heel.
I made a mistake of shaping the neck near the heel side, should have left it square so as to leave more allowance for heel shaping.
Any way I use the drum roller sander to shape it.
The front curve was done easily and nicely.
The only problem is shaping the side curve; not only I have to get the left side and right balanced I must also transit the curve nicely from the heel to the neck.
After some sanding it looks better than before but still some curve to smoothen out.

After the glue dried. The neck fully attached to the body.

Another view

Shaping with the drum sander drill attachment
The left and right curve still a bit unbalanced. Also need to correct the curve transition from heel to neck.

The frontal curve was done nicely.
20160625
The heel is done for now.
It's not perfect but reasonably acceptable.
Hmm.. I must think of a way to refine the heel shaping process.
The binding purfling problem is solved but now the heel shaping is affected.
Anyway I clean up by hand using sand paper.

Heel shaping done. Not really perfect though

The heel done another view.
No comments:
Post a Comment