Welcome to my guitar building blog.
This blog describes my journey into the world of guitar building.
I like to share my experience of building and hopefully it can be of some help to all the guitar making enthusiast.
Hope you enjoy my blog post!
2013-06-25
Making the bridge
20130214
I wanted to glue the lining but it was raining for the past few weeks, I had to do things which doesn't require gluing.
So I began to make the bridge.
I was wonder what bridge material to use, I had a few very good Madagascar Rosewood bridge blank which is light looks good and more importantly has a very glassy tap tone.
But in the end I choose a relatively OK tap tone Indian rosewood blank but is ultra light.
I intend to make this an all IRW guitar including using the IRW for fingerboard, so it makes sense to use IRW for the bridge too.
Furthermore I had this ultra light blank which makes a good candidate for the bridge.
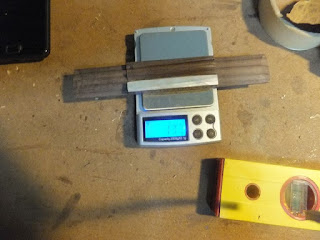
I wanted to see if I can make it about 15g. :)
If I managed to do that, that will be my lightest bridge to date.
The blank wasn't aligned with the grain, but it's big enough to saw away the 2 edges and still have enough for the bridge.
So I saw away the 2 skew edges and leave the grain square to the bridge.
It's a rift sawn blank, looking from the sides so I have no worries the saddle will break at the grain line.
Anyway after sawing away the skew part, I plane the blank to size and mark the tie block region.
Next I use the scraper to scrape the bottom of the blank and check the fit to the top doming.
When it's almost fitted, I put a sand paper on the top and sand the bottom of the blank.
20130219
Next I routed the saddle slot and thin the wings.
Unfortunately at the last pass for the saddle slot, I push the dremel router base over the fence.
So I routed into the front saddle block by a bit.
Now I just have to plug it in.
I measure the weight is not at 20g, it would be easy to hit 17 when U thin the tie block further.
20130322
I glue a MOP onto the tieblock and shape the wings to correct thickness.
Final weight is 18g, well one short of my target.
Without the MOP it's 17g.
I still have to drill the string holes and plug in the mistake.
20130618
I patched the small blotch whe I route the saddle slot.
I just hold a small piece of IRW cut-off with a pliers, and chisel it into a cylinder.
Finally I sand to correct size and apply glue to stick it in.
After the glue is dried, I saw off the protruding part and chisel the extended part in the slot.
It looks good now.
20130625
The last part of the bridge making involves drilling the holes.
I use my last set up to drill the holes.
It work reasonably well for me.
The base holes were drilled perfectly but the 2 upper holes for the 18 hole bridge, weren't as nice...
I didn't adjust the height of the RTX properly before drilling the upper holes.
The weight of the bridge after drilling is 17.7g nice!
I can't really wait to glue on the bridge.
Subscribe to:
Post Comments (Atom)


No comments:
Post a Comment