
20140714
Now that the channels are cut (finally) it's time to install the binding.
For this round I am thinking of trying out the CA glue method.
The method being taping the purfling / binding in place then wicked the CA glue in.
Actually I tried it when I was doing the headstock binding for the maple b/s neck.
However the tape used must be able to hold for a long time.
Current the white tape I using can only hold for 15 minutes of so, after which they will become slack...
So I need a strong tape, but the strong tape will leave residue on the top.
Anyway the other issue is the CA seeping into the spruce top's "microscopic tubes" structure staining it.
If you look thru' a microscope the spruce internal structure cell looks like tubes of straw bundle.
It's very much like compact nomex grid.
So the CA will seep in via capillary action and staining the wood.
So for the 1st layer black veneer I will use PVA glue and hold with pins.
After that the top should be sealed and I can probably use CA glue.
Alternatively the second marquetry purfling I can also use PVA glue (dries clear).
This is non-structural so PVA glue with the long open time and dries clear is a fitting glue.
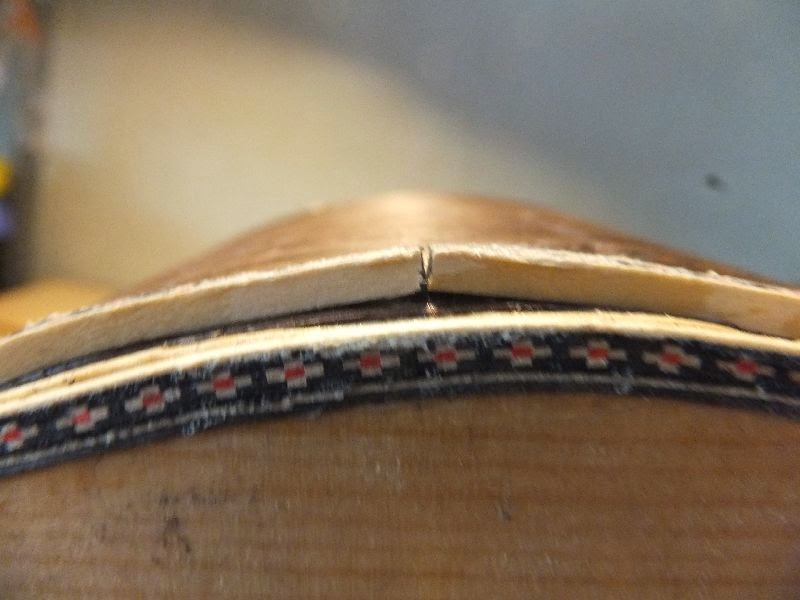
Here's the dry run

Dry run for gluing the 1st layer of black veneer purfling using pins to hold.

Close up look
20140718
Now to the actual gluing.
Nothing special here just apply the PVA glue and move along the length installing the pin accordingly.
Have to wipe away the excess and check that it's properly hold down by the pin.

Apply the glue.

1/2 way there. Install the veneer and hold it down with pins as with the dry run

All done.
20140721
After the first veneer is in, I plane it down a little so that it doesn't protrude too much.
This is to help in the taping of the purfling to hold down the purfling.
After that I bend the purfling a little for the waist part.
For the rest I just slowly bend to fit.
It does break but so long as it glue in properly it will be fine.
The only problem is that due to the curvature, the inner arc will be shorter.
This will cause a wrinkle in the inner most purfling layer.
So what I did was to cut it into 2 pieces for the inner most layer and reduce the length a bit.
When glued into the body it will fit nicely without the wrinkle.

Trim down the height of the purfling

Bend the purfling for the waist part.

Apply the glue

Start taping the purfling

1/2 way there

All done!

Some close up. Looks ok at the moment. Hopefully there will be no gaps!
20140722
I untaped the purfling and voila... some parts looks great while some not too great haha.
Those joints part aren't too good so they will need to be redo.
After that I started on the endgraft.
I miter the purfling and end up a little short of 1 purfling spacing.
But that can be easily solved.
The endgraft is glued into the channel and taped down.
Meanwhile I started bending the bindings.

Overall looks ok but some parts need to redo.

End section joint not so good

Some gaps here too.

Mitering the purfling for the end graft

Applying glue to the channel

Glued in the channel

Taped down and check the mitering.

Bending the binding

Checking the fitting
20140724
I fully bend the bindings.
The trick is really to go slow and the heat be absorbed by the wood before attempting to bend it.
The fit is very good.
I also started the side to end graft gluing.
This time round I use the CA glue.

Checking the fit for the binding

Gluing the end graft to side purfling. CA glue will be used for this time round.
20140728

Continued on the side purfling.
Suprisingly it's easier than I thought.
The purfling does break but the glue will hold it in place.

The view of the end graft and side purfling mitres.
Well it can be improved upon though.
20140731
I finished up the last section of the side purfling near the neck area.
I had to chisel an inlet into the neck to secure the purfling.
Also I glued in the back strip and one side of the back purfling.
This time round I use PVA glue and do in smaller sections.
I discover that the PVA will soak into the purfling and soften it making it easier to bend.
Now only left with the other side of the back purfling and the side purfling near the back edge.

Applying glue to the backstrip channel

Fully glued and taped down.

Started the perimeter back purfling. Starting with the mitre at the ends.

Continuing the purfling

Chisel the mitre at the other end

One side done.
20140807
Continued on the back purfling.
I look at the side purfling, the CA glue did not do a good job...
I think I stick to using PVA glue.
I continued on the other side of the back purfling.
This time round instead of smaller sections, I use water to soften the purfling and use a longer length of purfling.
Works pretty well.
Gaps! CA glue didn't do a good job

The front miter on the back purfling nicely done.

Starting the other 1/2 of the back purfling.

Glue and taped. This time round I use longer sections and use water to soften the purfling before gluing.

All done!

Looking good.

Miter came out quite good

The other miter.
20140821
I started doing the binding.
For this round I use the traditional Spanish rope method for installing the binding.
The good point about this part is that I can see the gaps and applied more force to close the gap.
For it to work I need to use the PVA glue which has longer open time.
The only problem is I pre-cut the binding to length 1st, so when installing the binding somehow the position shifted and the end butt joint was a bit off.
When using the rope method the butt joint is usually done last.
However, I wasn't that skillful yet, so I had to cut the joint 1st.

Repairing the defect in the purfling.

Glue it down.

Cut the binding to length at the butt joint.

Preparing to rope the binding starting at the waist.

Done roping the binding.
20140825
The rope was removed and the binding and purfling was plane down.
From front the guitar looks pretty good.
No visible gaps so far; the rope metho works very well.
I wanted to do the back too but I realise one section of the side purfling was not done so i had to complete that before I can go on with the back binding.

Planing down the purfling and binding.

The guitar from front. With the black binding border the outline of the guitar plantilla is very obvious. This makes it looks good in my opinion.

Chisel the channel for the last side purfling section.

Glue the purfling

Tape and hold.
20140828
The final part of the binding is the back binding.
Being more experience with the rope method I trim the binding to length just leaving a little proud.
I also marked markings on binding and back to locate exactly there the binding is positioned.
Then I started the process; I did the lower bout 1st.
The PVA glue has sufficient open time so should be OK.
After tightening, the binding became slightly overlapped (that is expected)
But I leave the trimming for later.
I continued with the upper bout 1st
Similarly the binding at upper bout was slight overlapped after closing all the gaps.
I trim it using sharp chisel using the heel as a base support.
It's OK as this part of the heel will be chisel away for the heel cap.
At the back portion I simply cut away a little by little using a nipper.
At the heel portion I clamp a block of wood to make sure the binding is closed.
This part cannot be reached by the rope.
Finally all is good.

The side purfling done from previous session.

Marking the binding length

Marking the binding length

Glue the lower bout 1st

All done.!
20140831
The binding was unstrung, all went quite OK except the heel part.
Not much gaps around. Have 1 or 2 spots which can be filled easily with dust and CA glue
The binding were scraped and plane down.
During the planing the back purfling was dislodged from the channel so I cut a section for that and glue it in.
I bought some new tools from StewMac; among them was a hard scraper.
It work great and after scraping the sides are literally gleaming.

After unstringing the binding wrap.

Heel end some gaps there.

Butt end was nice!

Cut some section to patch the part of purfling which was dislodged during the planing down of the purfling.

Glued and taped down.

Scraping the sides with conventional scraper

Using the new scraper from StewMac developed by Alan Carruth. It works great!

Sides gleaming after scraping.
No comments:
Post a Comment