Custom Search

2016-04-17

Installing the binding and purfling


20160305
The next step is to install the binding and purfling.
So I have to cut the channel first.
For this guitar the ornament is minimal, i.e. there are no side purfling or back purfling.
So I have a quite a bit of work there.
The only place that have purfling is at the front's perimeter.
The front purfling will serve to outline the guitar's shape which I think is very important.
This is especially so since the binding used is maple which is white and not very very good at outlining a shape.
The dark purfling line will enhance the contrast.

So I began to cut the channel.
I use the laminate trimmer this time round instead of the hand cutting the channels.
Well there are some areas which I will still need to cut by hand though.
Those areas near the heel which the router doesn't reach, I will have to cut by hand.
One of the main problem of using the standard router jig that comes with the trimmer is that reference used is based on the top instead of the sides.
I measure the top and back and they are offset from 90 degrees with the side by 2 degrees actually.
So I reference using the top or back I will be off by 2 degrees.
It's not really a big deal so in the end I didn't make the jig for routing this time round.
I test cut a channel to confirm the width and height.
After set-up I double check and began to route the channel.
It all went pretty well.
The channels are well cut and no accident :)


Test cut to check the binding fit.


Set up for the cutting of the binding rebate


Cutting the rebate.
The paper behind is to make the debris go down instead of flying all around.


Binding rebate nicely done.


Back set-up


Cleaning up the debris.
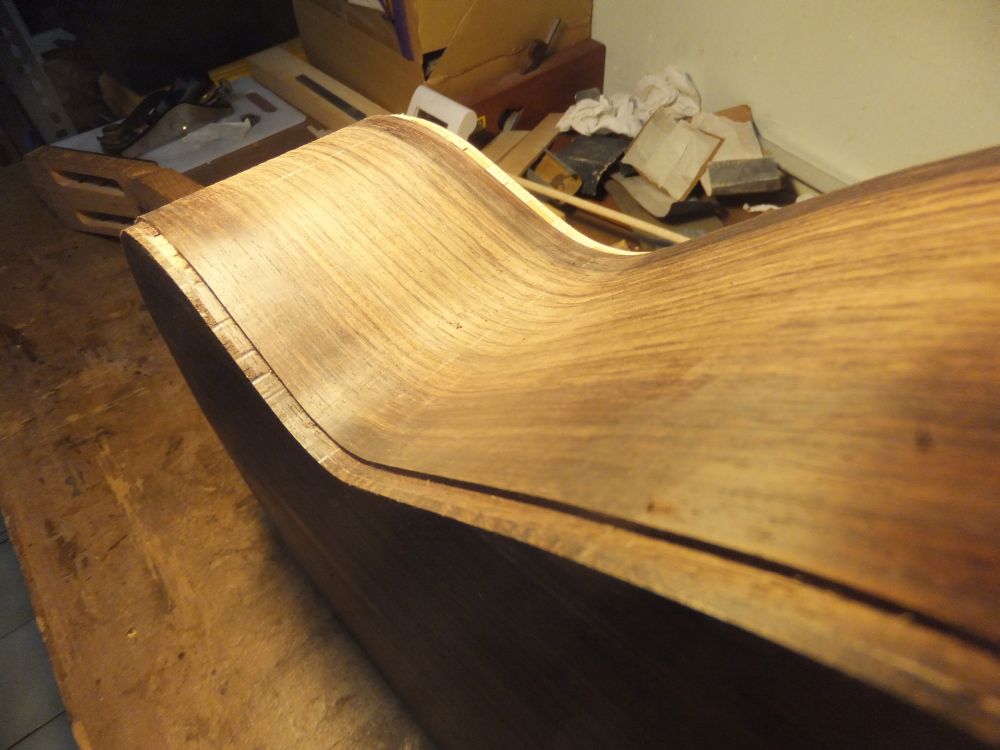

Checking the channel (back)


Checking the channel (front)


20160318
Next I cut the purfling channel.
The only difference I cut it by hand.
Using router will be too dangerous.
I use the gramil since my purfling cutter wasn't ready.
I change the blade but haven't go around to set it up properly
The gramil works fine for spruce top since you don't really need a lot of strength to cut the wood.
If for the back you will need the extra grip to pull or push the cutter.
That's where my self made cutter will excel as it has lots of area for gripping.

Anyway the channel was cut and level using both chisel and router plane.
The part where is unreacheable by the gramil, I have to score the cutting line by hand.
I did it using a French Curve and marking knife.
One part underneath the sound board wasn't supported well enough and so I glue in extra pieces to give it a solid support.
Similarly I cut the part on the back's heel region.

I test fit the purfling and the fit was good.
Next I began to glue in the purfling.
The purfling was held with tape only.
Next I began to bend the bindings.
All went well with no breakages.
I test fitted the bindings and so far so good.
However, I can't really think of good way of installing the binding.
My previous ways of installation was OK as I can't really see the gaps until the last part.
So I am thinking of a better process.
I saw an idea from Delcamp using an external support push the binding against the channel from outside.
It's really a neat idea but the only issue is I have to make them and materials might a be problem.
So now back to the pondering mode...

I also cut the end graft channel by hand.
First I score the line using marking knife and a square.
After that I saw the scored line using douzuki saw and chisel away the channel waste.
I have a piece of maple from a side cut off just nice for the channel.
After that I test fit and glue in the end graft.
I will need to plane it down though.


Checking the width of the purfling


Chisel the channel


Clean up with a router plane


Scoring the purfling channel using a gramil.


Scoring the neck region manually by using the French Curve rule as a guide and marking knife.


Chiselled away the waste. There is one hole underneath the top which needs to be patched.


Checking the binding fit


Glued in the patch.


Test fit the purfling


Applying glue to the channel


Installing the purfling. They are held by tape


Purfling done.


Marking the position reference for the binding


Bending the binding. (with 2 hands not 1 as shown)


All bent.


Purfling all nicely done.


Purfling at waist


Checking the binding fit and cutting the binding to size.


Marking the heel side.


Chiselled the channels.


Made a waist clamp for the bindings


Sawing the end graft


Chisel the end graft channel


End graft channel chiselled.


Test fit the end graft. A small section of binding is used to act as a stop block for the end graft.


End graft glued and taped down.


20160401
After the end graft was installed I have to plane and scrape it level.
I also use the file with safe edge to level the ends in line with the binding channel.
Now the binding channel is ready to take the binding but first the binding jig...


Plane the end graft level with the sides.


Scrape it level.


Using file (with safe edge) to file the end graft level with the binding channel.


20160412
Finally I installed the bindings.
I was experimenting with different ways of installing the binding.
Basically what I didn't like about the current way is that I can't really see the binding when I am installing it.
So if there are any gaps I won't be able to do anything about it.
So actually I modify one of my old solera to make into a binding jig of some sorts.
The idea is pretty similar to the various binding jig out there with pins at the side of the solera for ropes to tie the bindings in place.
I wanted to add a centre section so that I can do one side at a time.
However as I try out I discover the tension will come loose when the centre section shifted so I gave up the idea.
In the I revert to my original way of installing binding: tape first then rope.
The tape is able to hold it in place until I tie the entire 2 sides binding in place.

After I did the top binding, I leave it for the glue to dry while I worked on the fingerboard.
When the glue is more or less dried, I removed the rope and check.
So far so good - no gaps.
Then I came to work on the back section.

This time round I use duct tape which is stronger and is able to hold the binding in place better until I bring in the rope.
The spring back on the binding for the back is more.
For the back and side woods is more resistant to the strong tape so I have less worry when peeling off the tape.

Before I glue in the binding I spend some time cutting and trimming the bindings to length.
The ends are marked then sawn.
The fine trimming is done with a chisel.


Trimming the bindings to length
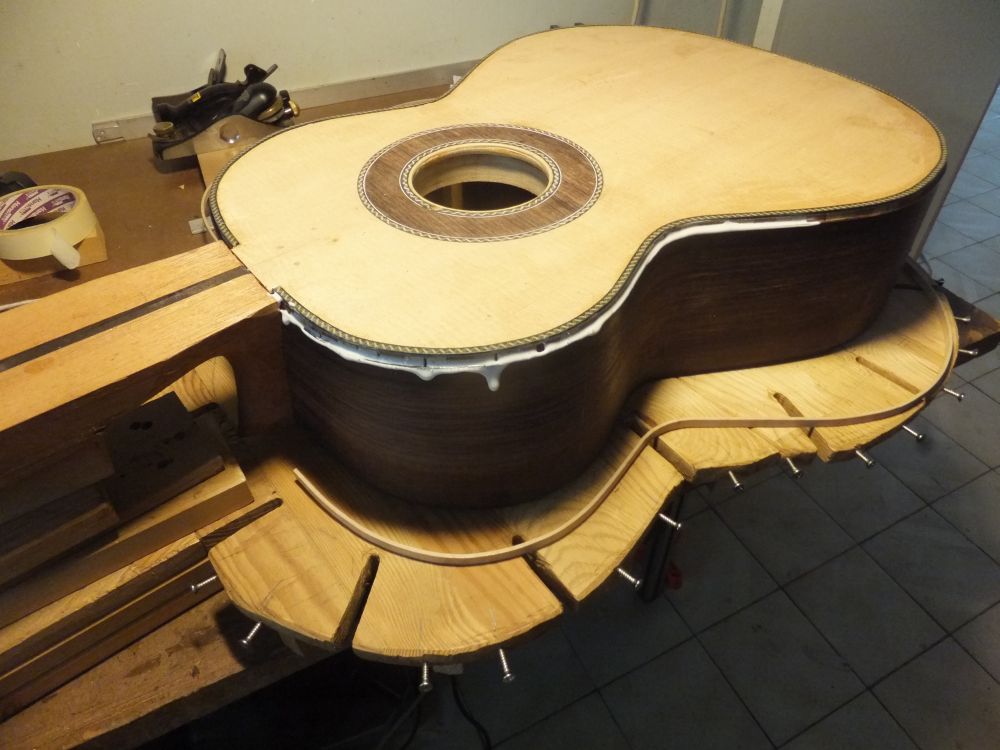

Applying glue onto the binding channel


Glue one side of binding using tape first.


Both side glued and taped


Finally tightening the binding with rope.


Front binding done. Looks good with no gaps.


Trimming the binding length.


Glue one side.


Both side done.


Tighten with rope.


20160417
After the ropes and tapes are remove I check the binding.
So far so good, no gaps seen.
Think taking the time to trim the length and glue the binding helps a lot.
After that I began to scrape the binding / purfling to fit the sides / tops


Scraping the bindings to fit the sides


Back view


Front view

2016-03-28

Shop Tour


20160328
Well I didn't have much action these few weeks due to work, so I thought I do a tour of my workshop
Essentially my workshop is just small table.
That's where the main action is.
Well I did wanted to have a proper workshop with a proper workbench etc... but well due to space constraint that's not really possible.
My workbench is a just a simple writing desk with a slab of MDF on top.
The art of clamping the work piece depends a lot on my vast number of clamps and some jigs.
Below the workbench I stored my power tools.

View of the work shop


Another view


Main work bench


Underneath the table is where I stored the power tools

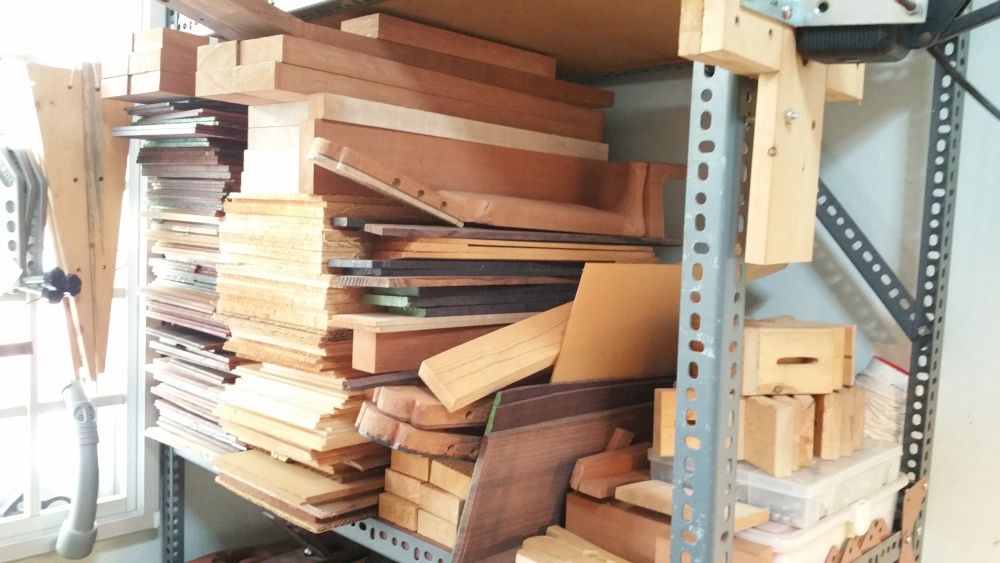
My main storage rack is just beside the workbench.
This is where I store my woods too.
The top portion of the rack is where all the sides and necks are.
At the 2nd section (from the top), I stored the tops and backs.
3rd section contains the tools mainly.
Ground section contains the fingerboards bridges in the storage box.

Top rack stores the sides necks


Next higher level stores the backs and tops


This section is my tools mainly (planes etc...)


Bottom section are where the fingerboard and bridges are.

Behind me is atable where most of my clamps are held.
Actually it used to be right at the rack but that's just waiting for accidents to happened.
And if the clamps come undone during when I work on the guitar, the technical term will be bad.
So I shifted to clamp the clamps behind me instead.
I have lots of F-clamp and cam clamps.

Behind me by the side is where the dehumidifier are.
It's pointing mainly to the woods and workbench

Also at the other end I store my soleras or workboard


My dehumidifier. The fan has died so I attached an external fan instead.


Clamps!


Soleras

I also hang quite a number of tools by the window grille.
Including one of my unfinished top
Below the grille is a section where I kept miscellaneous things like my veneers bindings etc... and my 1st gen solera which I am going to modify for binding work.


Tools and tops hanging on the window grille.


Misc things are kept here. Just under the grille.

At the other room I temporary store my go-bar deck.
Normally I will dismantle it if I am not using for sometime.


Go-bar deck.

2016-02-12

Closing the box!


20160211
Happy and Prosperous Chinese New Year to all!

Finally the box is closed!
It has been raining for the past few weeks and I have been waiting for a good weather to close the box.
I checked the weather forecast and these 2 days will be cloudy just nice for closing!
So I proceed to close the box.

I didn't do much dry run as I still vaguely remember the steps when I last closed my #5.
So I raised the solera so that the clamps can go underneath it.
Most importantly I checked the alignment one last time before closing.
Then I placed the blocks of wood used for distributing the clamping force evenly around the perimeter.
I am all set to go; I heat up the hide glue and proceed to close the box.

After applying the hide glue, I use the light reflection to make sure all is applied evenly.
Then I heat up the hide glue using the hair blower to prolong the open time.
I proceed to glue in the back making sure of the alignment.
The clamps are applied next, frequently checking the alignment.
As you apply pressure to the clamps, the back will move.
Finally all is done.
The clamp's reach at the neck block is barely enough, so I use a plane to weight down that part.
Also I clamp a cross piece across the 1st back brace position to ensure good fit with the back.


Preparing for the closing.
All clamping blocks are placed within easy reach.


Applying the hide glue


Applying the hide glue at the neck side.


All clamped.


Checking the fit.


View from the neck end


View from the butt end


20160212
After the glued dried for 1 day, I trim the overhang using plane and chisel.
Most makers probably will use a router with trim bit for this step.
For me with sharp tools it can be completed quite fast too with less noise and less chance of mishap.
I recorded the tap tone and did a spectral analysis, so far the resonances are all well placed and this guitar's eventual resonances might just hit my ideal points exactly (hopefully!)


Removed all the clamp and the guitar from the solera.


Trimming the overhangs


Shavings on the floor everywhere


Front view of guitar


Close up front view.

2016-01-28

Prepare for closing box


20160115
I glue some backing veneer to the sound port region.
Well although this guitar is not having any sound port, but nonetheless I better glue some veneer incase next time the owner decides to change his mind.
The backing consist of 5 layers of veneer, alternate in grain orientation for each layer.
This should give plenty of strength.

I also made a small tornavoz.
It's made of paulownia which is very light and weighs only 3 g for the ring.
The reinforcement will probably weigh another 2 g or so.


Prepare for gluing the sound port backing.


Glue the 1st layer


After all layers are glued, they are clamped


Bending the wood for the tornavoz


Clamp to shape


Weighs about 3 g (2.9g to be exact using the other scale which is more accurate)


Can the the taper at the ends so that the overall thickness is about the same.


Glued to the top


With reinforcements.


One last look before closing the box


Another look


Another view front and back


20160128
While doing the annual spring cleaning of my workshop / house, I work a bit on the neck / head.
I clean up the tuner slots; it was rough cut previously
Now it look much better


The head tuner slot cleaned up!

2016-01-19

Repair on a Thames guitar - Excellent StewMac customer service!


20151112 - 20160119
I had a customer who brought his Thames #858 guitar for repair.
Actually there was nothing wrong with the guitar.
The only part that broke is the Sloane tuning machine.
One of the button was loose from the shaft.
Thus no tuning can be done on that string. (G - treble string).


So I contacted StewMac who was the retailer for the Sloane tuner (manufactured by Waverly)
I must commend StewMac for their excellent Customer Service; the service they rendered was really top class.
They agreed to send me the replace at no charges (not even the shipping!)
Here is one company who believe in providing excellent services.

So the replacement parts arrived fast after our correspondence
Unfortunately I was charged GST (VAT) for the replacement parts which aren't supposed to be charged.
After contacting the DHL (SG) customer service still I need to pay the GST in order to receive the goods.
Without a choice I had to pay up first in order to receive the goods.
But the DHL customer service meanwhile help me to inquire from SG Govt Customs regards GST refund for this good
However, SG Customs require me to write in personally and so I did.
After showing them various evidence, they still insist that this GST is chargeable although various parts of their website implied that parts imported for replacement / repair may be exempted from GST.
Though the GST tax-free application must be filed first.
What is bad is that the SG Customs customer officer didn't even know how to reply a proper email with the correct response as to why this is chargeable.
They simply want to close the case and write stand template replies.
So much for SG50 progress... their service really suxs
Their mentality is more like "Please don't create more trouble for me" and not truly understanding the case and helping the customers / people with their enquiries Anyway enough of ranting, so I gave trying to reason with the Customs customer service officer which weren't even apt in explaining the SG GST taxation law to anyone....

FYI, the spoilt tuner was shipped back to USA, so there was no nett increase of the physical item
Why should there be any GST charge???

So I removed the original tuner and installed the new one.
I check that the holes are perfectly drilled which they are.
Also the holes are deep enough.
I thought it's the root cause of the problem but all the guitar was build correctly in this aspect.
It's just a poorly made tuner for this case.
After that the owner wanted guide dots on the guitar so I drilled and glued 3 MOP dots on the side of the fingerboard.
As I have to file level the dots I had to refinish that part of the finish.
This is really quite a saga.
I will never talk to the SG Customs again if I can; their knowledge and service really sux....

This Thames #858 2013 was a Spruce Indian Rosewood guitar fitted with a full depth Tornavoz.
The bass is very sonorous, however IMO the mids are a little shy due to the resonances being placed too far apart.
The air resonance was F2 85Hz and main top resonance 196Hz G3.
In between there wasn't any peak at all to support the mid notes.
So this explains the shy part.
Anyway it was still quite a nice guitar for Tarrega pieces!


Broken tuner - loose button


Removing the existing tuner.


The spoilt tuner.


Both tuners removed.


Installing the replacement.


Can see the full depth tornavoz here.


Install the dots


All installed and polished.