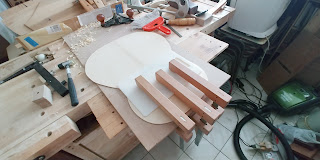
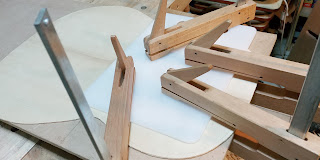
I started on #10 a while back, now I will be continuing the build.
The original owner gave up on the commission which was meant to be a 7-string guitar.
However, one of my later customers took over the #10 instead as he like the back a lot and so we propose to do something different.
I will elaborate more as we go along.
The dates might be different due to some of the steps I actually did in between the build of #11 when I waiting for something other steps
20210207
Right now we will continue with joining the top.
I just joint with my usual jig after shooting the edges straight.
For this build I choose a lighter density Englemann spruce.
This is for a special purpose which I will explain later in the build journal.
20210208
Next step was to thickness the top to a suitable thickness for inlaying the rosette.
I was monitoring the weight of the top also as I thickness
For this build the thicknessing will be an important consideration.
After that I cut out the top plantilla shape.
This will give me a more accurate readings of the top's weight.
Next is to design the rosette, it will be a simple wood rosette surrounded by my usual purfling.
I had bought the wood rosette specially for this project and choose the better grain of the 2 squares.
I routed the circle strip from the wood rosette and measure onto the top to see where to route the rebate for the wood rosette.
20210216
Next is to inlay the rosette ring onto the top.
So after marking the placement I use my circle jig to scribe the mark and remove the channel using a router plane.
I prefer using hand tools for greater control.
20210218
After the channel is routed, I check the fit of the rosette on the channel.
Once satisfied I proceed to glue the rosette in.
During the routing, some parts of the edges are chipped out but it can be remedied later.
20210220
After removing the clamps, I proceed to trim level the rosette with the top.
It wasn't easy as the rosette is prone to tearout, so I had to use a high angle block plane to plane.
20210222
Next will be routing a outer channel for the surrounding purfling for the rosette.
Same process is used here using the circle jig to scribe then route with router plane.
20210223
Next will be the inner purfling channel.
Same process is done here too.
20210225-26
Next I trim down the purfling and began to thickness the top.
For this thicknessing I will be taking frequent measurement of the thickness.
I want a consistent thickness for the top.
20210227
Once the target thickness is reached, I cut out the soundhole.
Usually I will label the soundhole cut out as a reference of the thickness and density of the top.
Ok now I will explain more about the top.
I am doing a double top guitar for this build.
However, I am not using the nomex as per Dammon / Wagner style of double more of a pure wood double top.
The air pockets are done by routing channels into the wood.
This is the main reason why the thickness is very important.
I dont have a drum sander so I had to manually plane the thickness even throughout.
20210227 - 0313
Next I began to route the air pockets into the top.
I use a Aluminium bar to guide my dremel router with Stewmac base.
Then I manually route the pocket controlling the length of the pocket visually.
The process repeats until I completed the entire top.
There are some radial spaces which remains unrouted.
These are for the bridge area and the additional feature for this Double Top.
Next I shall explain those spaces in between the sections.
Those are meant for inlay carbon fibre strands tows
This is for controlling the orientation of the stiffness.
I got this idea from my experience of making Table Tennis bats.
The CF really increase the stiffness of the bat tremedously.
BY controlling the CF I can direct the stiffness where it is needed.
In this case I am opting for a radial stiffness alignment.
However, the bracing will be a fan brace.
So the result will be an interesting combination of the 2.
20210327-28
Next I began to glue in the CF tow.
I use epoxy glue for the gluing of CF tow.
The process is quite simple.
Simply use the brush to spread the glue onto the CF tow and top.
After that I glue in the cover veneer forming the double top construction.
For the enclosing veneer I use a walnut veneer as I cant find a suitable thin veneer.
The weight is slightly heavier than normal spruce or cedar veneer.
However, I think it will be interesting as to what kind of sound will the guitar give...
I form the top doming on a temporary MDF board by sticking cork sheets to the perimeter forming a dome in the centre.
This is because my usually solera is too big to go into the vacuum bag.
But nonetheless this method worked quite well.
20210403
Next will be the bracing.
As the top is sufficiently stiff now, my bracing for this top will be very light 5 fan brace with a cross strut.
However, the height of the bracing will be quite low.
Unlike Bouchet bracing, the cross strut will be under the fan instead of above.


No comments:
Post a Comment