Welcome to my guitar building blog.
This blog describes my journey into the world of guitar building.
I like to share my experience of building and hopefully it can be of some help to all the guitar making enthusiast.
Hope you enjoy my blog post!
2015-04-23
Inlay the rosette
20150125
So I began to inlay the rosette onto the top.
First I began by drilling the 3mm hole for the center pin.
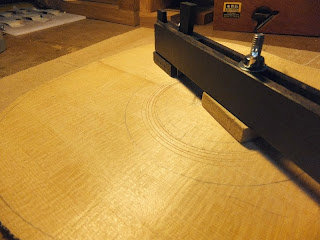
Then I trace out the circle of the rosette onto the top.
I began to cut the rosette channel by using my circle cutter v2 tool.
This cutter works great!
20150128
I continued on the rosette channel.
After that I dry fit the rosette and adjust the channel accordingly.
To glue the rosette, I flooded the channel with the white PVA glue which dries clear.
After that I place the rosette in and clamped it down.
20150130
After the glued dried I plane down the rosette.
Looks pretty good.
I did some purfling mock up to see which scheme fits better.
20150312
Finally some work done after a long break.
I began to inlay the surround purfling.
Not a hard job but I have to be carefully to do a good job
I routed the channel and slowly enlarge until the dry fitting is quite snug.
After gluing the purfling would expand and fit the gap.
So I apply the glue in the channel and glue the outer purfling first.
The thin white line I insert in after the main purfling is in.
20150320
I trim down the purfling and began to inlay the 2nd inner purfling.
The steps are similar.
20150325
After the glue dried I stripped away the tape and check out the inlay.
As suspected, it wasn't as good as the outer rim.
There were gaps which is quite noticeable.
After some thinking, I decided to redo the inner ring.
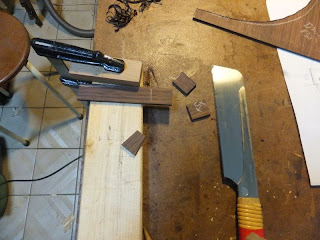
So I use my 2mm chisel (which is very useful for rosette work) to chisel away the inner purfling.
After cleaning up the channel, I am thinking what to do to make the purfling stay tight.
That was when I recall about the pin method...
So I will do layer by layer instead.
I apply glue to the channel and glue the white inner purfling first which will be hold down tight by the pin.
Now to wait for it to dry.
After the glue dried. Looks much better!
20150402
Before I inlay the main purfling I clean up the channel and did a dry run.
I think I need to inlay a few more black purfling to fill up the gap.
So I use the pin method and inlay a layer of black purlfing.
20150403
First I clean up the channel to prepare to for the inlay.
After that I did a dry run to ascertain the fit.
There is some gap so I would have to use the pin.
Finally the main purfling is inlayed.
There is a bit of gap so I use the pin to make the purfling close to the inner rosette.
After the purfling is inlayed I use the 2mm chisel to press it down.
20140404
I shave down the purfling and check the fit.
Looks pretty good except for one portion.
From far it cant be seen actually.
20150423
I replace a small section of the purfling
So I just use chisel and take my time to chisel away that section.
After that I use my spare piece of purfling and cut to fit that section carefully matching pattern.
The result seems quite good during the dry fitting.
2015-04-03
Making the rosette
20150109
I started making the tiles for the rosette.
The rosette will be similar to my #2 which is made from segmented tiles and surrounded by a purfling.
To make the tile I cut and plane a reference tile.
After that I make a temporary shooting board which is angled to help in the shooting of the tile pieces.
The 1st part the stopper is angled to allow the piece to be shoot easily.
There is straight side support to help stablise the tile raw blank.
The 2nd part is the side support is also angle since, this is because when shooting the 2nd side of the tile, the other side has already been angled.
To support it I simply take one of the already tiles :)
To prepare the blank, I use IRW and maple back cut-off and some smaller silver oak pieces.
I cut then into strips and saw to approximately the tile black.
I should have set a stopper next time.
After shooting I will confirm the angle using the diagram.
I don't really need sophisticated jigs or something.
Just need to rack some brains to help ease the process.
After planing shooting, my hands ached...
20150123
I did up more tiles of silver oak and maple and ebony.
Now I can complete a ring of them.
The problem now is which to choose...
So I proceed to glue them up for the maple with ebony.
As for #7 rosette, still kind of undecided...
20150127
I glued the various pieces of tiles together.
Now it sure looks good!
20150131
After the rosette is glued I began to cut the edges to make it round.
Well an accident happened as the router bit climb into the tile.
Luckily it's at the edge where the fingerboard is.
So all is well.
On hindsight I should have screwed the jig properly it wasn't holding enough.
I only screwed 2 out of the 4 screws thinking that it's enough to hold the rosette.
So next time no shortcut...

Outer ring routing
As you can see I only screwed 2 out of the 4 center screws for holding down the rosette...

Glue back just one part as it came loose during the routing.
You can see the climb cut at the start/end of the rosette
20150312
I glue up the rosette for #7
The method is the same.
20150403
After so long a break finally get to finish up the last piece of the puzzle.
I began to route the rosette.
The steps are quite similar to the previous rosettes
But I learn from previous mistakes: use all the available screws and I draw the arc on the blank to have a good idea how much to route.
Subscribe to:
Comments (Atom)


