
20140307
I began to saw away the outline for the various back.
I had 3 backs to saw away: #5, #7, #8 I started with #5's back as I wanted to close the box for #5.
Due to a lot reasons, #5 was delayed.
Anyway I decided to push forward and try to close the back within this dry season.
For this back the outer edge is pretty close to the plantilla shape.
So I use a coping for the sawing.
Care must be taken to support the pieces during the sawing so that it will not break.

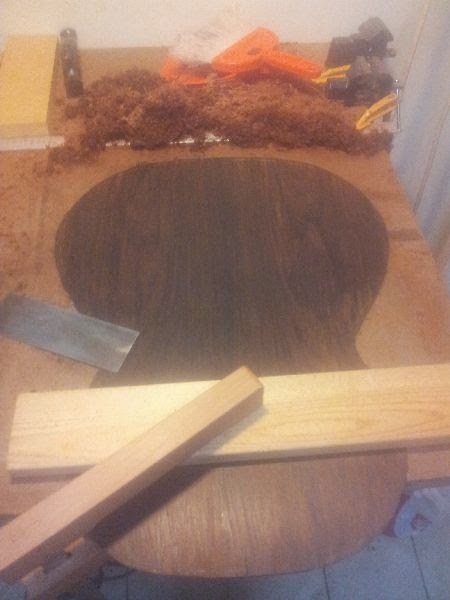
Starting the sawing process.

1/2 way thru'

Sawing done.

Fitting to the body

Here's the back.
20140318
I began to thickness the back using the new Lie Nielsen scrub plane I had bought sometime ago.
I never know thicknessing is so easy :)
With the scrub plane I easily reduce the 6mm thick to 2.6mm within 30 mins or so.
Far better than I used to do with normal plane.
I was using a clamp on one end and a stopper Al bar at the other end for me to plane at 45 degrees to the grain.
Unfortunately the clamp gave way and the back was knocked on the Al bar and it snapped into 3 pieces or 2.5 pieces.
I examine the back and concluded that was a weak point of the back as the 2 cracks were mirror positions from the joint.
Anyway I glue it back as though they where joints and they should very strong if not stronger than before.

Thicknessing using scrub plane. It's done at 45 degrees and held by a clamp and Al bar stopper.

Can see the curve ridges after being planed by the scrub plane.

The back broked into 2.5 pieces 1 complete crack and 1 crack 1/2 way. I suspect is a point of weakness on the back. The crack positions were mirror images of each other.


At first I want to use the jig for re-jointing but I discovered the back is too small to be used by the jig. The rope will not push against the side edge of the back on one side.

So I just use 3 sticks and wedge instead.
20140320
I released the clamp and check the crack repair.
It looks quite nice.
After scraping the surface, the cracks looks virtually invisible.
As for the other side, I clamped 2 ends this time round and plane the ridges level with normal jack plane.
Finally I scrape it smooth.
It will be ready for closing the box.
Stay tuned folks!
The back being scraped. You can see 2 tones of scrapings. One from the outside surface one from the newly planed inside surface.
The outside has be oxidised till pretty dark whereas the inside being freshly planed is of lighter color.

Preparation for closing box dry run.
No comments:
Post a Comment