20131105
Sorry for the delay in updates.
I was really busy for the past few weeks (work, family, other things), resulting in not much being done.
Being sick for the past week didn't help too.
Anyway I think I should be ready for assembly this week.
Once the weather becomes better I will start the assembly process.
This few days has been raining so the RH will be too high for gluing.
Gotta be a little patient :)
Anyway stay tuned...
20130920
I also began to prepared the end block for assembly.
The end block blank was quite thick and so I saw into 1/2 thickness (slightly more than 10mm thick).
Following that I shape it using block plane and sanding block.
The sanding block is actually the end fence of the solera where the 2 butts of the sides met.
Closer to assembly time :)
20131007
I shape further the neck's heel block in preparation for assembly.
Check out the neck making post last part.
20131018
I first measure the top thickness and router planed the same thickness onto the neck's heel block area.
After that I smoothen with sandpaper and plane.
But upon checking on the solera seems like I have remove too much material on the neck.
It's ok I will be adding one more piece onto the top to thicken it and then shave down to fit the neck.
I saw the slant on the sides after measuring the slant angle on the neck side slots using a slide bevel.
I measure the distance from the center line and mark the base onto the sides. After that I transfer the angle form the sliding bevel to the sides.
It is very easy to get the slant orientation wrong so before you saw away do double check triple check to confirm.
Place is side by side on the neck and visually ensure the angle is correct.
Then I saw away the excess.
The sides were too thick so I use the right angle rule as a stopper and plane the side until it fits the slot.
After the sides can fit in it will be almost assembly time!
20131107
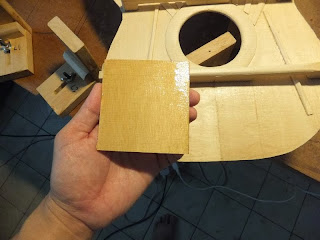
I glued in the patch for the neck.
Next will be gluing neck to top the start of assembly.


No comments:
Post a Comment