Custom Search

2015-12-17

Guitar for sale: Spruce / Maple Thames 2008

I have a friend who has a guitar for sale.
It is a Spruce Maple guitar made by US luthier Michael Thames.
Anyone interested are welcomed to try the guitar (in Singapore).
Please contact me at my email.


Luthier: Michael Thames
Year of construction: 2008 (#707)
Scale length: 650mm
Nut: 52mm
Top: Spruce (Bear claw)
Fingerboard: Slight elevated, ebony
Back/sides: Birds-eye maple
Arm-rest: Rosewood
Tie block: 12 holes
Finish: French polish
Condition: Good (shallow string ding behind the bridge for the 1st string)
Tuners: Alessi dark mother of pearl.
Price: SGD$5000 (negotiable)
Case: TKL


Spruce / Maple Thames 2008


Here is the arm rest which will make playing more comfortable for the right hand.


Close up of the rosette.


The back, a beautiful piece of bird's eye maple.


Alessi tuner machine with a rare black MOP.

2015-12-04

Prepare for Closing the Box


20151117
I have been wondering how to fit the continuous lining with all the side braces.
In the end I decided they don't go well with one another.
This is after much much thoughts, as my building process does not goes with continuous linings.
So it's back to using the reverse kerfed lining instead.
The main reason is really the support side braces for the traverse bracese.
I like to match the position of the 1st 2 back braces with the UTB and LTB forming a sort of temple gates.
This will definitely break the continuous lining...
So what good is a continuous lining if it's not continuous?
So after really a few weeks of thought, I finally decided to use my usual method of lining assembly.

The main breaks are the 3 side braces support for the 3 back braces.
The 1st 2 will coincide with the UTB and LTB respectively.
The last side brace will support the 3rd back brace.
However, it's slight displaced from the Bouchet traverse brace.
The side braces used is also different 1st 2 pine is used.
For the 3rd the ABW is used.
There will be a series of ABW side brace span thru' out the perimeter of the sides.
This will add about 300g+ of mass (total of 2 sides) to the sides.
The extra mass will create a mass impedance to make the energy retain in the top instead of transmitting (and thus wasted) to the sides.
Anyway the rest of the side braces will be inlet into the dentellones and the rev lining.


Gluing the 4 side braces for the UTB / LTB and 1st 2 back braces


Checking the curvature arch for the back to ensure the curve is smooth.
But if you ask me what radius? I don't know.
Should be somewhere in the 15' radius region.


Checking the mass of the side braces before gluing


Gluing the side braces for the 3rd back brace.


Wetting and clamping the lining outside of rim for it to conform to the curve.


Gluing the lining


Gluing the lining


The 2 gates I mentioned earlier. Looks good isn't it?


The lining all glued.


20151126
The lining is planed down to the sides rim and also the back braces are shaped so that they form a smooth curve nicely.
I use an Al flexible bar to check for the smoothness.
As to what radius this is, I have no idea
To me so long as the curve is smooth it'll do just fine.
Using radius dish is a faster and no-brainer method but involves too much dust.
Using this method ensure the back is smooth curved but each back is not exactly the same; there will be some minute differences in the curvature.
Good or bad you decide but for me this is good.

The side braces are saw to length, filed and sanded (no sharp edges); the splinter are pretty sharp.
The lining is notched to accept the side braces.
Luckily I spent sometime sharpening my chisels the other day, they are a pleasure to use now.
After that I didn't glue the side braces as it was a rainy day and this spells trouble gluing at high RH especially for cross bracing.

I had another idea this time round is to add a centre vertical brace supporting the back brace to the LTB.
It's sort of like the sound post on the violin but different in the sense it does not impede vibration which mainly at the lower bout.
I am thinking of either 2 or a single sound post support.
But anyway this idea is not fixed yet if it does it'll probably be removable.


Trimming the lining


Checking the smooth curve for the back.


Notching the lining / dentellones for the side braces.


Sides braces notches done, the side braces are temporarily taped to the sides. It's not a tight fit to allows for some expansion


Side braces inletting done.


Weight of side braces 273 g. Need to include the 2 supporting the 3rd back brace which is 44.6 g. They add up to 317.6 g.


Some preview pic of the assembly


Another view


Another view.


With the back


The sound post idea I was mentioning earlier. The main idea was to make the upper bout a very stiff structure so that the lower bout can concentrate in producing the sound. This is with 2 supporting post.

Similar idea with single post. Likely the post will be a removable feature in the event that it doesn't work out sonically, it can remove easily. Anyway during gluing time these post will be very help in supporting the back brace.


20151204
I finally get a chance to glue the side braces.
Not much tricks here just apply glue and clamp.
I also fill up the space around the LTB and UTB.


Preparing to glue the side braces


Clamping the side brace


All glued


20151206
The side braces all dried.

Look of the box; more or less ready or closing


Another view


The side braces tend not to be too visible. I usually prefer some contrast

2015-11-05

Levelling the fingerboard


20151105
I was not satisfied with my #1's fingerboard.
The relief is too excessive: even though the action may be 3 and 3.5mm, the upper frets is still quite hard to play.
So this day while pondering over how to install the continuing lining with the side braces for my #9, I redo the fingerboard for my #1 instead.

The frets were all removed, I was quite amazed how shoddy the fret work was then.
Well can't be help as I didn't have the tools to file away a bit of the fret ends then.
So this time round I made it right.
The fret barber remover by Stewmac was really a great purchase, not only the fret barbs was remove easily, I can use to correct the shape of the frets after removal.
Thus the frets can be reuse easily after removal (since there is no much wear and tear).
After the fret were removed, I began to shave off the fingerboard at the nut end to correct the excessive curvature (relief). I use my high angle plane which plane the ebony easily and without any tear out.
I constantly check for the straightness of the fingerboard.
After all is levelled, I sand the fingerboard up to 320 grit.

Then the process of fretting begins which is quite tedious as I need to file the file ends, thin down the studs.
Finally when I all is done I check the string height at bridge region which is within 10mm to 12mm (the optimal height for classical guitar)
When I strung up, the guitar plays wonderfully! Nice!


Someone brought in a guitar for me for repair too.
The top has a crack developed at the end lower bout's right wing.
However upon putting my hands in to check the crack, I realised it's has been repaired.
There were 3 diamond cleats glued at the place where the cracks developed.
So the maker might have know something...
Anyway since there is no need to glue in any cleats, I help him to make another saddle for a slightly higher action.


20151117
Some updates on this guitar.
The maker has replied saying he reinforce the region beforehand as it look weak.
Well that's a legitimate reason.

After this guitar 2 more people has brought the guitar for me to repair.
First one was just a simple set-up (lowering of the saddle) and the other was having a buzz problem.
The first guitar was a Estudio Ramirez.
Not only the saddle was with high action, but the slot of the saddle was actually curved.
So I use my 2 mm chisel to flatten the base of the saddle slot at the bridge.
This guy was complaining to me about another luthier which didn't do a good job for him regarding this saddle.
Well I don't really know what was happening then so I refrain from commenting too much.
I duplicated the saddle but with 1 mm lower.
The action was spot on

For the 2nd guitar, I located the buzz to be a fret problem (too high).
Since the fret was seated properly, I had to file it down and re-crown it.
After that the buzz was gone.
Initially he though the buzz was caused by a loose brace.
My examination did not seem to suggest so as there was no wood rattling sound, more of a metallic rattle which would suggest the string hitting the fret.
After checking the fret 3 by 3, I found a particular fret was higher than the surrounding frets.
So I proceed to lower it accordingly.
After the repair I gave all the fret a steel wool polish to restore the shine.
Sorry no pics to show anything.


Pulling out the frets


Planing the fingerboard at the nut end


Installing back the frets


Another view


Done


Action at 12th fret


Now the relief is just nice!


The guitar which was already cleated. 3 diamond where the crack was.
This means someone in the original workshop must have known that the crack was already there and repair it.
IMO I can safely rule out the owner's fault nor due to shipper's mishandling (unless the shipper knows how to repair guitar haha)
Anyway I won't say who's the maker, since I do not know exactly the entire process of what's happening so it's unfair for me to comment further.


2015-10-22

Assemble the guitar!


20150924
The haze is getting bad these few days hitting 300+ regions hazardous..

Assembling the guitar is one of the most satisfying stage of the build.
Maybe it's because the guitar will take shape.
Anyway for this #9 I began to assemble the guitar.
To ensure the fitting of the various part I spend quite sometime aligning the various parts in the pre-assembly stage.
With the use of the side mould the assembly process is much easier and more accurate.
Previously for normal guitar (non-elevated) I was using the movable stops, but they weren't too accurate in ensuring the plantilla shape of the guitar.
The side mould work much better.

The assembly process is quite simple; glue in the end block, glue the peones or dentelleones, glue in the neck side wedges.
So I began by dry fitting the end block which was sanded smooth and the surface aptly prepared.
I check to see how many clamps were needed and where to clamp to ensure maximum fit.
After that I began to heat the parts and began the gluing process.
The clamps were applied swiftly as I have done the dry fitting process.

Next I began to glue in the peones.
I tried 2 white blocks (same material as the back lining) and 1 cedar block.
This will make the looks more interesting.
As the glue I use is hide glue, I just need to hold the block for a while before continuing to the next.
The hide will pull the 2 surface together as it dries.

Next I glue in the wedges.
The wedges were pre-fitted before so it's just a matter of applying the glue and hammer in the wedges.


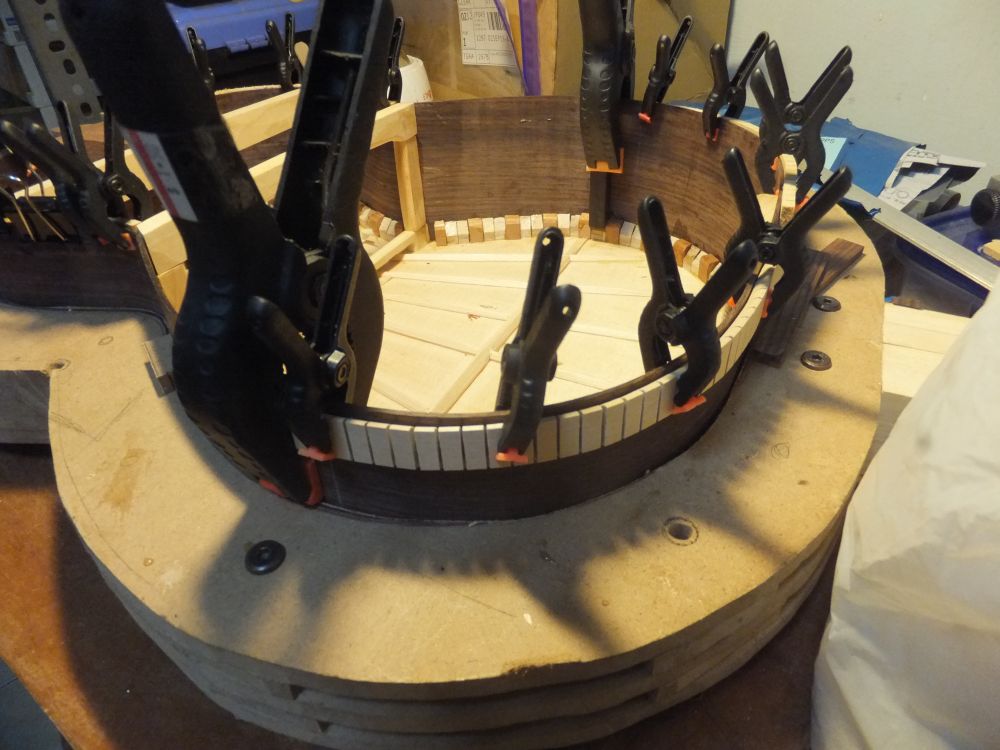
Began the assembly process. The end block was drying fitted noting where to apply the clamps.


Applying the hide glue


Glued and apply the clamps


Glue the peones


Glue the peones


Apply glue to the wedges.


Glue in the wedges. The wedge is self clamping too.


All done.


All done


All done


20150927
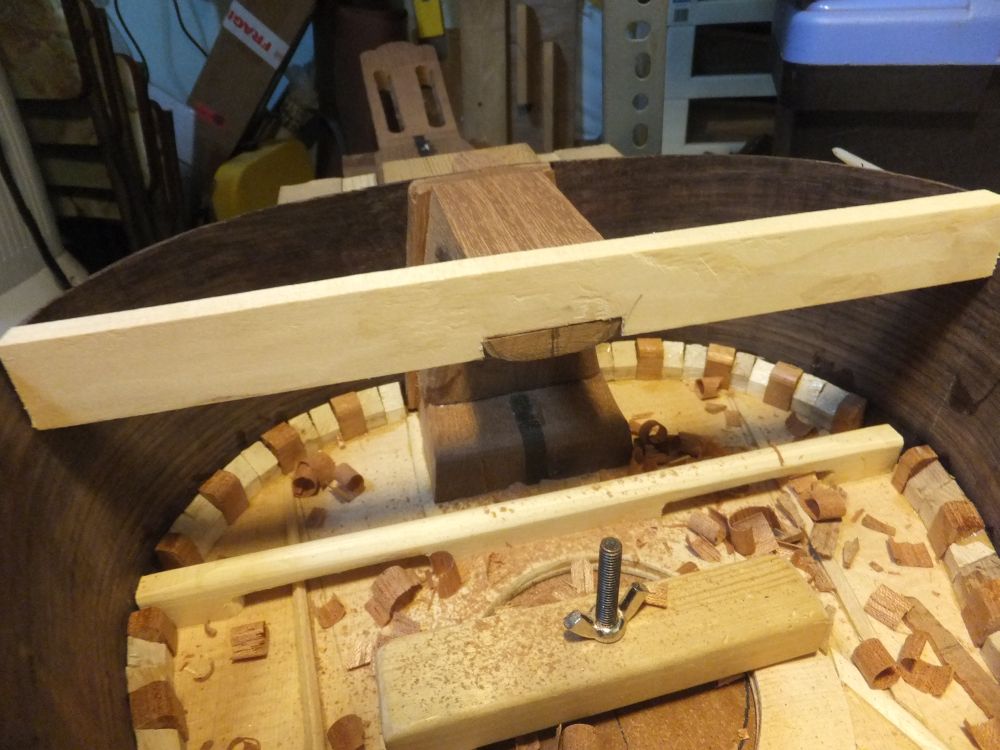
After the clamps are removed, I saw away the excess end block and wedges.
After that I began to profile the sides and the foot.
The profile is based on the curve block which I made sometime ago.
Normally it requires sanding but I just profile with the block plane which is faster.


Saw away the excess end block


Saw a way the excess wedge
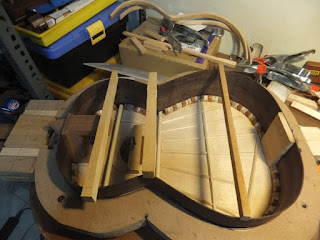

Profiling the sides


Checking with the curve stick


All done.


20151011
I worked on the back lining, to profile it with a nice smooth profile.
Originally I use a dremel-typed rotary tool (RTX) to profile it but the result wasn't too good.
In the end I just use a chisel / marking knife to shape it manually and then sand it smooth.
I also consider to option of using ABW (African Blackwood) for the side braces.
Amongst rosewood they are one of the more stable rosewood available and more importantly they are heavy.
It will add about 400g of side mass to the sides.
This will help to lower the top resonance which is beneficial for Bouchet-braced tops as they tend to have high resonances.
Furthermore the lowering of the top resonances does not require the addition of mass on the bridge which is good.


Marking the length of the back lining


Carving and sanding the profile of the lining.


Profiling done.


Thinking of using these for the side braces. They are heavy and stiff and stable.
It will add about 400g of mass to the sides which helps to lower the top resonances by 6 Hz or so.
This is beneficial for top with Bouchet brace design without adding mass to the top.


20151015
I made some side bracings from African Blackwood.
Ooo they are sure heavy and hard(which is good).
It's damn difficult to saw by hand.
I had to sharpen the saw now and then after a few cuts.
For the 2 main side brace to support the main traverse brace, I use some spruce.

However due to continuous lining, I haven't figure out how to exactly to mount the side braces.
They have to be inlet-ed in to the lining for sure but how exactly to accomplish that is still a mystery as of right now.
I also cut up some back braces too.


Cutting the side braces from ABW blank.


Another view


Prepared some back brace.


20151022
I worked on the back braces.
The 1st back braces was fitted to the foot.
The Spanish foot will support it from below thus making a very rigid part at the neck / heel area.
This region is prone to lots of tension from the string pull.
Thus by strengthening this part the deformation will be reduced.
I use the Aluminium rule to check the back curvature.


Sawing the rebate for the back brace in the foot.


Planing the rebate / shoulder


Cut the notch in the back brace. There is still a lot of meat left in the brace so this does not compromise it's strength


Back brace fitted


Checking the curvature of the back


Glue 2 pieces of brace together to form a better gluing surface to the sides.


Total mass about 300g or so (will get less after shaping the braces)


Preparing the 3 back braces. Can see the arch in the back braces


Another view