Custom Search

2015-08-19

Bracing the top


20150720

Bracing is perhaps the more enjoyable part of the build.
First I lightly sand the top on the gluing side.
Then I draw the outline of the template onto the top at the bracing side.
This is followed by the bracing marking.
For this tops I am using my bracing which is derived from Bouchet.

After the bracing markings are done, the I started to glue in the bracing.
For the brace blanks I have already prepared and cut previously.

Before that I took some time to assemble my go-bar deck.
I did some modifications to the upper deck which block some holes from the threaded rod so I have to enlarge the holes a bit.
But that was done pretty quick.
After the go-bar is set up, I began to heat up the hide and the gluing process.

First I glue in the donut sound hole reinforcement.
I had to cut out the inner circle first and lightly sand the piece.
Following that I cut the braces to size according to the layout which I had drawn.
Then I glue in one by one.
I have enough go-bars to press in all the fan brace at once.
Anyway I think I should make some more go-bars...

After sometime all the fan are braced up.
I check and make sure no gaps.
This is very crucial as the bracing directly will affect the sound of the guitar.
Now to wait for it to dry...


Tracing the outline of the plantilla from the template onto the top.


Draw out the bracing layout.
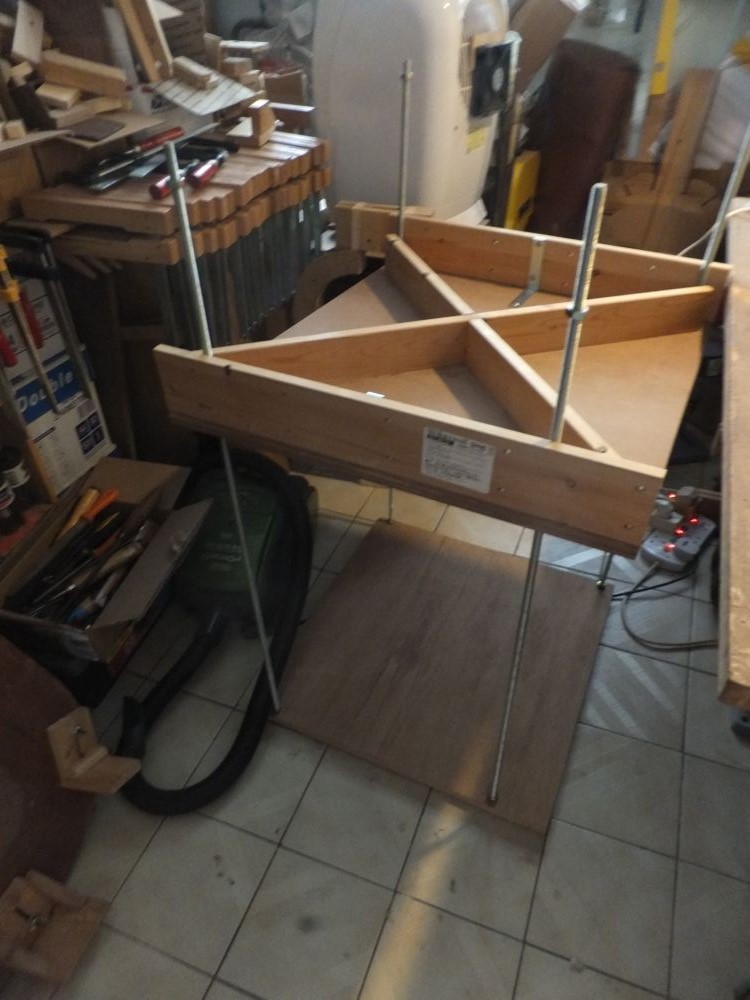

Setting up the go-bar deck.


Now it's ready!


Gluing the donut soundhole reinforcement ring


Apply the go-bars onto the ring


Cut the braces to length.


Bass side done
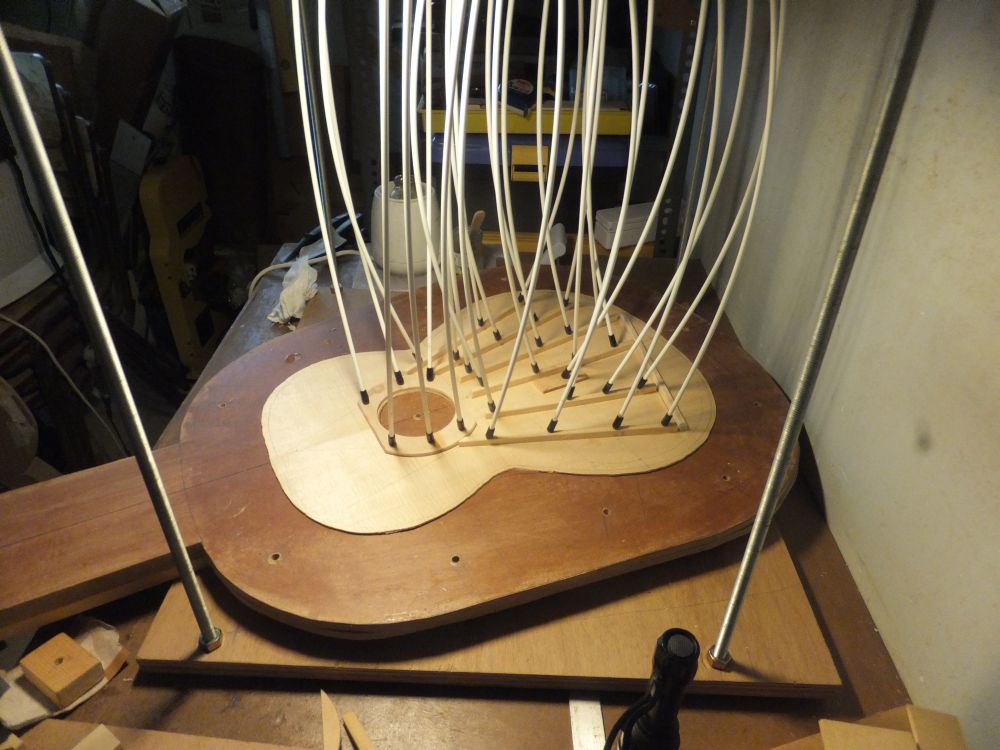

Treble side also done.
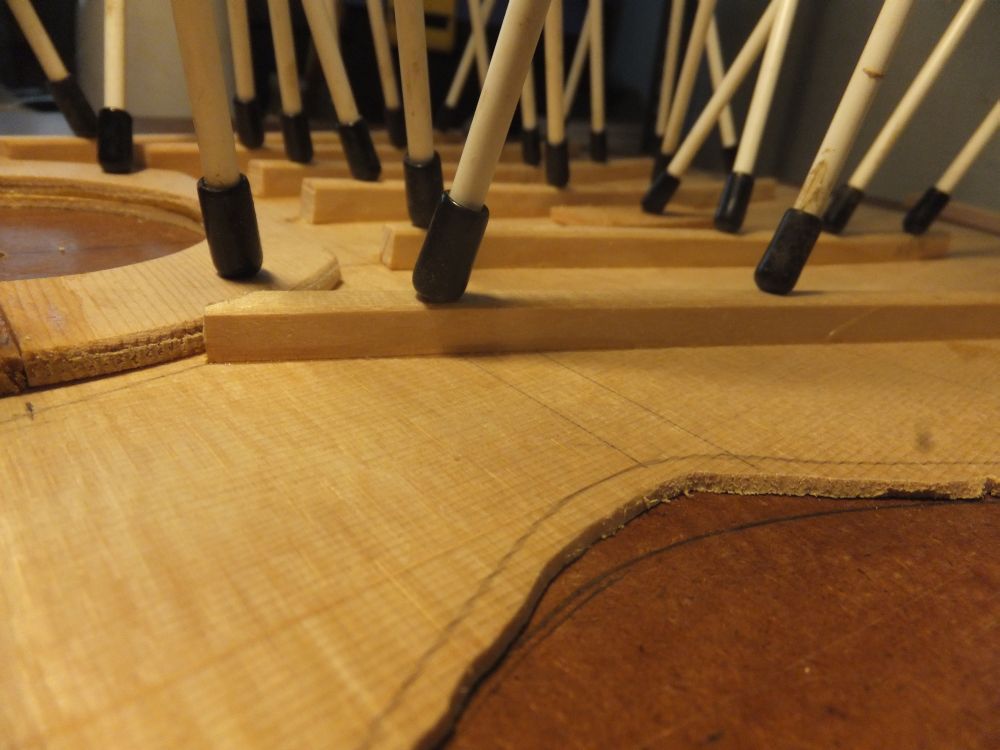

Make sure no gaps!


With the neck


20150722
After the glue dried, I began to shape the bracing.
The process is quite simple also.
First I make reduce the height of the bracing to the predefined height and then make the cross-section profile into triangular shape.
Finally I shape the longitudinal profile to a parabolic at the 2 ends.
After that I also profile the reinforcement ring too.


Shaping the braces with plane


Can see the triangular cross section profile


..using chisel


..with another plane to triangulate the profile.


Shaping the sound hole donut


Can see the profile of the donut


Done.


A look with the traverse brace.


20150724
I continue the brace gluing; this round is the 2 side braces and the end closing brace.
I also marked out the curvature for the bouchet brace.
As it's a massive brace, the method will not be press to make it conform like the smaller fan braces.
Instead the bottom arc will be planed into the Bouchet traverse brace itself.
The tricky part will be fitting over the fan braces.


Prepare to glue


Gluing the side braces and end closing brace


Another view


20150727
After the glue dried I carved the braces.
Also I traced the doming arc onto the Bouchet traverse brace.


After glued dried.


Tracing the doming arch onto the Bouchet brace


Carving the end closing brace.


Braces carved. The weight of top is about 150++g now. After the 2 Traverse brace and Bouchet brace is on, I will try to reduce the overall weight. My guess is that it should be under 200g in total.


20150805
I began to fit the Bouchet brace notches to the fan braces.
The profile can be tricky but with patience it can be done easily.
First I profile the bottom of the brace to the solera doming
After I shoot the base with a block plane and check the fit to the doming.
Then I mark the peak of the triangle of the center brace on the bottom of the Bouchet brace.
I saw a little and chisel a small notch on the bottom of the brace.
Note that the bouchet brace will touch the center brace 1st by virtue of the convex shape.
Thus will do the notches one by one and adjust and deeepn the notches accordingly.
The simple rule is to parr away the wall of the notch which touches the triangle of the fan braces.
Adjust all the notches until the fit is OK.


Shape / shoot the bottom of the Bouchet brace.


Check for fit with the doming.


Saw a small depth for the notch


Use chisel to start a small notch


Check for fit of the notches. Parr away the side of the notch which touches the fan braces.


All fitted nicely.
The 2 stops behind is to help position the Bouchet brace and to hold the dome of the top also.
(一石二鳥 【イッセキニトリ】, Kill 2 Birds with 1 stone)


Another view


Drill the hole for the aperture in the LTB / UTB


Saw away the waste for the UTB / LTB


UTB and LTB cut out nicely. Now need to smooth and shape the UTB / LTB before gluing


20150814
Now to the gluing of the traverse braces.
The hard part of fitting the braces has been done so this is actually quite straightforward.
Except one part which I need to add some extension to the go-bar top part.
When I position the stopper for the Bouchet brace I shifted the solera forward for easier access.
But now the UTB is out of the top deck's range... so I can't possible use go-bar for gluing the UTB.
I tried using cam-clamp but it tends to tilt the braces forward...
So I clamp and extension of the top deck to allows the go-bar and it works like normal.


The Bouchet braces you can see the different direction of the fan braces notches


Bouchet brace glued.


LTB. You can see that the blocks which are glued to the tops are either slanted or curved so that they do not stress on a single grain line on the top.


LTB glued.


Extension of the go-bar top deck for the UTB gluing.


UTB glued.


Between the Bouchet brace and LTB


Between the LTB and UTB


20150819
The braces are carved and sanded.
After that I weigh the top is about 196.5g heavier than my #3 but still within reasonable variation limits.
I did some frequency analysis too, but it's off my reference seems like I need to remove a bit more of the brace's height.


After removing the go-bars


Carving the Bouchet traverse brace


Bouchet brace carved


Carving the UTB and LTB


Weight of top 196.5g


Checking the side rim fitting to the top.


20150903
I am preparing for the next stage.
Right now the top is tuned and sides are ready.
Here's some pics of the assembly preview.


Top on the side mould.


Neck on the top.

2015-07-23

Bending the sides


20150722
I began to bend the sides.
Nothing too different from what I did previously except for the new mould.
Anyway the bending process is using my heat pipe powered by the heat gun and bend with hands and 2 small blocks of wood.
After the sides are bent, I place them in the mould.
Using the centre lines of the mould I marked and cut the ends.

After that I prepared the end blocks too.
A single end block blank can be used for 2 guitars but cutting into 1/2


Bending set-up with heat pipe heat gun.


One side bent


Cutting the ends.


Both sides bent.


Sawing the end block into 1/2


Saw tracking nicely.


Done. For the upper bout I use clamp to spread out the sides.

2015-07-05

Thickness the sides


I also thickness the maple sides for #8.
The sequence of thicknessing is scrub plane, my wooden plane and finally high angle plane.
After removing the initial layer of maple I can see the beautiful flame figure.
Maple does not really likes to be planed, I have to plane at an angle to avoid tearout.
But the HA plane is really doing a good job of levelling it smooth without tearout.


Straightening one side of the sides for the top facing edge.


Began planing. You can see the flame figure after removing the initial oxidized layer.


Sequence of planing Scrub -> Wooden Smoother -> HA plane


Done!


Look at the waste shavings / chips.


20150705
The sides are saw to size.
Some binding can be made from the cut-off of the sides.


Cutting off some excess from the sides. It can be used as bindings.


Cut-off done.

Thickness the sides


20150526
I began to thickness the sides.
Originally I plan to braced up the top but due the recent wet weather I decided to postpone that step.
Thicknessing the sides is pretty straight forward, I did it with these planes:
- scrub plane - remove main bulk of material in chips
- #5 jack plane - to smoothen the ridges form by the scrub
- HA smooth woodie - to further smoothen the surface.
If I follow this scheme of removal the thicknessing is pretty straight forward.
But it still takes a great deal of effort.
I was left panting all the way.
Guess I am really out of shape ... haha.


Plane one edge straight first (top edge)


Scrape the outside face smooth


Planing starts...


Look at the amount of waste produced...


Sides thickenessed. You can really feel that it's very pliable. Now it's ready to be bent.


20150529
Final smoothening of the surface before bending using scraper.
Also to ensure both sides are same thickness at the same point.
This is especially crucial at the butt or end block region.


Final smoothening using scraper and also ensure the 2 sides are same thickness at the same region especially at the end block region.


20150705
The sides are saw to size.
Some binding can be made from the cut-off of the sides.


Cutting off some excess from the sides. It can be used as bindings.


Sawing off the excess

2015-06-27

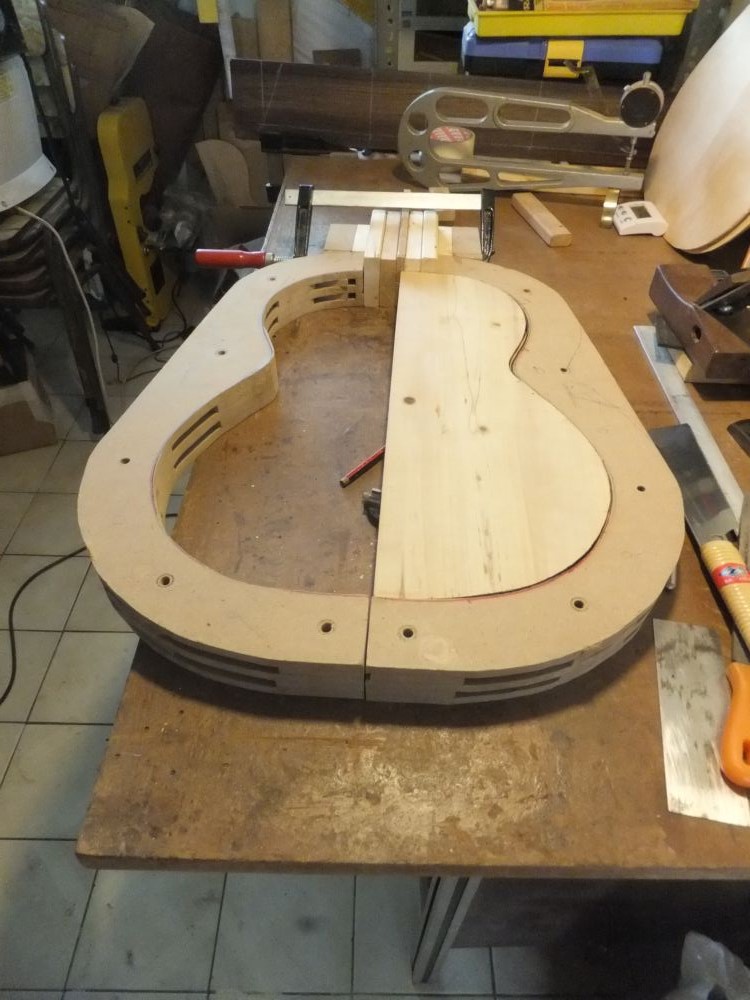
Modifying the Side Mould


20150223
I am constantly reviewing my building process actually.
Now I am modifying my existing side mould to include an neck extension.
Also I will include a block at the end and some locking mechanism so that the 2 side mould can be hold together.
This will hold the sides assembly together and able to detached from the main solera.

I had this idea because I wanted a more accurate way of gluing the back struts to the back.
After shaping the back struts overall profile, I can locate the position of the back brace more accurately by removing the sides and view it from the other side (the sides aren't glued to the top yet.
My build process will change in sequence a bit due to this.

Also I might be planing to increase the height of the side mould a bit and maybe duplicate another side mould for holding another sets of sides together.
Any I'll see how much time to sidetrack to do this.


Checking out how much extension to do a the neck / heel side.
For Spanish slotted heel, the side mould will need to have an opening space for the heel part.


Saw the pieces to length.


Glue the pieces to the side mould


Clamp the pieces.


20150312
Some more progress for me.
I cut and glue the enforcement strips and wood together
After that I probably drill in some drywall screws to reinforce them


Glue the sections together


Glue the side with pine.


20150320

Side mould taking shape.


20150529
I added the block of wood between the two mould at the head part.
I didn't explicitly measure the thickness, I just add and subtract from my pile of scrap wood until the 2 mould fits.
After that I size the block of wood up accordingly.
I double check the size with my 1/2 template.
It fits nicely.


checked the size of the required block of wood between the 2 mould and double check with the plantilla template.


Now all sized up and ready to drill hole and then glue up. I need to trace the shape of the top curve also.


20150605
I saw away a section of near the centre of the side mould.
This is to give a perpendicular surface for the clamps to hold the sides to the mould.
In the past, the unparallel surface of the inner and outer perimeter of the side mould always cause me problem when clamping the sides for the section just before and after the waste.
After tracing the inner perimeter to the outer, I saw away the excess.
Now it is much easier to deploy the clamps.

After that I work on the front extension part.
Instead of the solid block I decide to make it using 2 piece of wood (top and bottom) with some inner filling.
No particular reason why.

I also thought of extending the height of the side mould by adding more pine pieces in sections
But I have not really decide to go ahead or not.
This will reinforce the neck extension section of the side mould.
But if the side mould is too high, then I would not be able to clamp the lining easily.


Saw away a section near the waist to give a perpendicular clamping surface for the clamps to hold the sides to the mould.


Still sawing the section


Both sides done.


Glued the neck piece


Another view


20150616
I glue in the end blocks to hold the ends together.
I drill 3 dowels to reinforce the blocks.
Hopefully they will be strong enough.
Now I think the mould is all set to be used.
But I am still pondering to add in 2 more layers on top and below or not.


Glue in the end blocks reinforced by 3 dowels.


Another view.


Also prepared a stopper detachable block in front. When the heel block is there this can be removed.


20150620
I tested the side mould by securing it with bolts.
So far they work just nice!
The strength seemed OK so I will be reinforcing them later.
Also I made some center press blocks for pushing the sides against the mould from the center using some extender.


Gluing the head piece


Gluing the waist blocks


The completed side mould.


20150627
The side mould is done.
I made the lower bout spreader blocks too.
Then I drilled holes into the spreader waist blocks and made some slots into the lower bout blocks.
After that I applied the hardware and they work as expected.
Only thing is the pressure seem to force on the end joint hold and spread it further causing a slight gap.
Seems like I have to reinforce the end joint portion.


Lower bout spreader block


Side mould completed


20230219
The solera as of today.


Solera with side mold


With the guitar


With the centre neck portion wedge removed.

2015-05-25

Thicknessing the top


20150525
#7 top was thicknessed the same way as the other 2.
The final weight came to be about 133.3g which is similar to #9
This is not surprising as I think they are from the same or similar trees
After the top was thicknessed I remove the sound hole and measure the density of the wood.
Actually this is not really a very accurate way of measuring the density.
It would be more accurate to measure when it was still square as the margin for error is larger.
With such a small sample, any variance will cause a larger error.


Cutting out the sound hole after thicknessing


Weight of top 133.3g