Welcome to my guitar building blog.
This blog describes my journey into the world of guitar building.
I like to share my experience of building and hopefully it can be of some help to all the guitar making enthusiast.
Hope you enjoy my blog post!
2020-12-16
Binding the guitar (back), End graft
20201031
First of all I decide on the binding to be used.
Originally it was planned to be using red colour binding (blood wood) but because the body itself is a bit reddish brown, the contrast does not come out good.
So after discussing with the owner, we decided to use ebony instead as it provided a good contrast with the backs as well as the top.
20201128
After all is done, I finally began to cut the binding.
The binding jig works relatively well, but I did some tweak to the binding jig to make it track better.
The top part was extend a bit to make it more stable while the side reference is made closer to the binding bit.
After both channels are cut, I use my chisel and files to correct the binding channel itself.
20201205
After that I spend some time to correct the channel dimensions using chisels, files, and rabbet planes.
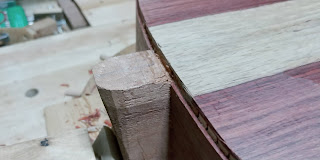
Then I cut the end graft channel using saw and chisels.
20201212
Next I began the binding process.
At first I wanted to use the binding jig for working 1/2 the sides of the guitar, but in the end I just go without it as it's easier to access all parts of the guitar while working.
First I glue the purfling using white glue and CA.
The CA will hold it in place while the white glue gives it strength.
Next I began glueing the binding.
After measure and cutting, I began at the end graft area.
As I tied the ropes, I began to glue the binding also.
Similarly I use CA at certain points to help to hold it.
At some portion I had to use big clamps to force it in place due to the spring back of the binding.
Finally as I reached the heel area, I cut the excess and glue in.
20201213
After scraping the binding, the binding looks good without major gaps.
The gaps can be closed easily with some CA and clamps.
Next will be the other side of the binding.
To make them fit I tie the 2nd binding flush with the channel and mark the length at the butt end.
Then I trim it using a saw.
When I started binding I started with the butt end instead of the waist.
When I reached the heel end then I measure and saw to length and adjusted with chisel.
This way the fiting is perfect without any gaps due to overlength or underlength.
20201219
Next I plane and scrape down the 2nd side too.
Good no major gaps.
Subscribe to:
Comments (Atom)


