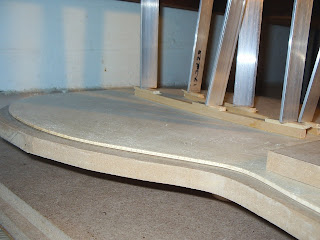
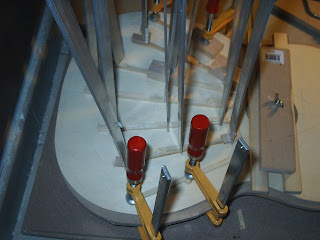
During the last 2 or 3 weeks, there happened to be pockets of free time available and so I worked on the guitar.
First of all, I resaw some of the struts to make more square especially the gluing surface.
Subsequently, I draw the struts layout on the top board itself basing the on the Torres fan design.
The fan struts had a focal point some where in the 15th fret region.
Most design of fan struts are in the 12th fret region but Torres' fan focal point is 52mm into the body and the outer fan will make a right angle (90 degress) with the enclosing struts.
All the information is from the Romanillos's book on the life the of Torres.
Then I saw the the struts to size according to the layout.
Here is the final layout

Another view.

Gluing of struts
Then comes the problem of how to clamp the struts while gluing down.
What to use to hold the struts in place while gluing?
As discussed previously I decide to go for the bamboo go bar method.
However, the bamboo gobar is not usable.
As the bamboo's thickness is not uniform, the go bar produced had varying strength.
So I gave up that method.
I contrived several other methods but to none seem to satisfy the need to press the struts into the depression.
In the end I discover that the set of Aluminium bars which I purchased for making the Cam clamps, had a potential to become a go-bar instead.
When I tried it, it was very successful.
So I decided to go with this method.
Due to time constraint I did not build the go-bar deck but use the underside of the table top instead.
However I soon to discover that the I need heavy weights to hold the whole thing in place as the go-bar was pushing the table up.
So building a go-bar will be next on my to-do list.
Here is the top board with the markings and ready for gluing

Gluing of struts

Another view: Note the doming especially for the centre struts

Close up view

All the struts in place.
The outer struts was using F-clamp due to lack of Aluminium bars and also the upward force exerted on the table top was too great.
Now I know why they use go bar deck instead of a simple table top.

Front view


Weights to keep the table down (mainly books)

Here is the topboard after the main fan struts are glued

The doming effect in the topboard

Carving the struts
The next day, I removed the struts from the go-bars.
I am pleased with the results considering its my first attempt in gluing using the go-bar.
Some struts slided on the surface thus dirtying the topboard.
Next I proceed to carving the struts.
At first I was using the finger plane but the length of the small plane was slightly too long considering that the struts was domed.
So I end up using the broad chisel I got from Daisol instead.
The chisel wasn't really that sharp and so I had quite a bit of hard time trying to carve the struts.
Due to some carelessness I accidently scratched the topboard with the edge of the chisel while carving the struts.
I was deciding between shaping the struts round or triangular.
At first I went for triangular but in the end I end up with round as round is the easier of the 2 to make it look nice.
The final shaping was using sandpaper to smooth the roundness.
Factors to consider when carving a struts
- Sharpness of chisel
- Protecting the top board while carving.
Luckily I did not glue the enclosing the struts because when I taper the ends I always over shoot the chisel.
If the enclosing struts were there, they'd sure be damaged...
Carving the struts

Tapering the end of the struts

The struts after carving

Another view

The full fan struts with the traverse bars (not glued yet) and the enclosing struts

Gluing the soundhole reinforcement and the enclosing fan struts
Next I proceed to glue the enclosing fan struts and the sound hole reinforcement
The sound hole is a weakness in the topboard and thus requiring the strengthening strip.
Some design like Hauser just simply have 2 vertical strips around the both sides and the top and bottom is strengthened by the traverse bars.
But I preferred a ring design and so used a ring instead.
For clamping down the reiniforcement I simply used the screw (which was used to secure the whole top board in place)
As for the enclosing struts, I used F-clamps and the Ibex bridge clamp (longer reach).
The planes are simply there to counter balance the lopsided weights at the enclosing struts end with all the F-clamp in place.
If not the whole board will toppled off the table top...
The process of gluing

Another view

Close up

