20151117
I have been wondering how to fit the continuous lining with all the side braces.
In the end I decided they don't go well with one another.
This is after much much thoughts, as my building process does not goes with continuous linings.
So it's back to using the reverse kerfed lining instead.
The main reason is really the support side braces for the traverse bracese.
I like to match the position of the 1st 2 back braces with the UTB and LTB forming a sort of temple gates.
This will definitely break the continuous lining...
So what good is a continuous lining if it's not continuous?
So after really a few weeks of thought, I finally decided to use my usual method of lining assembly.
The main breaks are the 3 side braces support for the 3 back braces.
The 1st 2 will coincide with the UTB and LTB respectively.
The last side brace will support the 3rd back brace.
However, it's slight displaced from the Bouchet traverse brace.
The side braces used is also different 1st 2 pine is used.
For the 3rd the ABW is used.
There will be a series of ABW side brace span thru' out the perimeter of the sides.
This will add about 300g+ of mass (total of 2 sides) to the sides.
The extra mass will create a mass impedance to make the energy retain in the top instead of transmitting (and thus wasted) to the sides.
Anyway the rest of the side braces will be inlet into the dentellones and the rev lining.

Gluing the 4 side braces for the UTB / LTB and 1st 2 back braces

Checking the curvature arch for the back to ensure the curve is smooth.
But if you ask me what radius? I don't know.
Should be somewhere in the 15' radius region.

Checking the mass of the side braces before gluing

Gluing the side braces for the 3rd back brace.

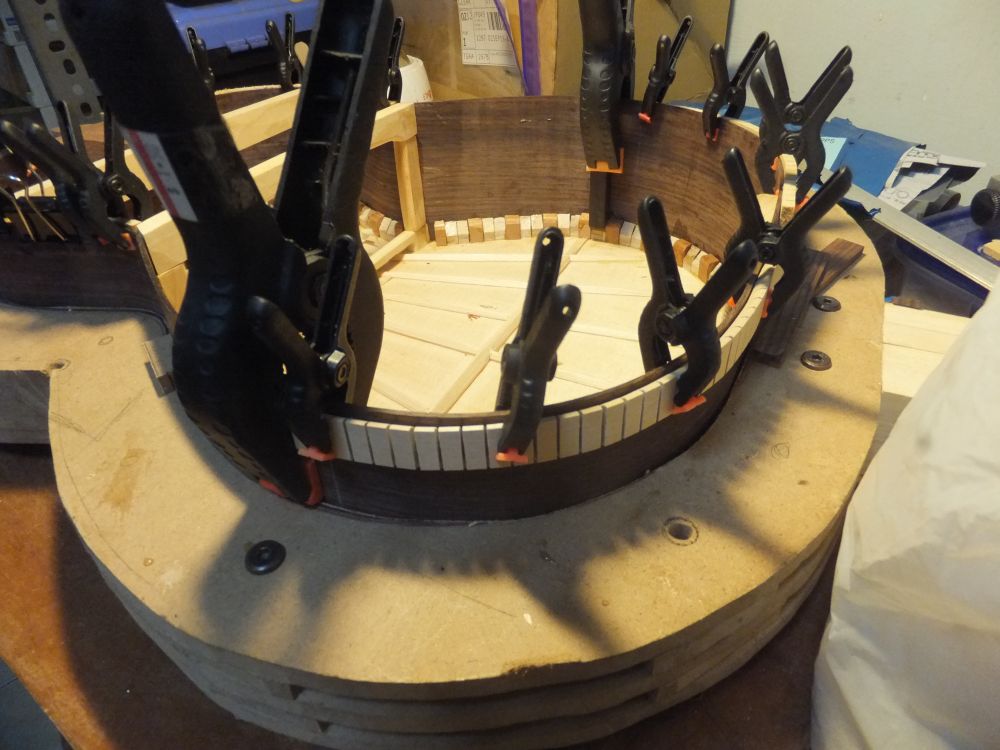
Wetting and clamping the lining outside of rim for it to conform to the curve.

Gluing the lining

Gluing the lining

The 2 gates I mentioned earlier. Looks good isn't it?

The lining all glued.
20151126
The lining is planed down to the sides rim and also the back braces are shaped so that they form a smooth curve nicely.
I use an Al flexible bar to check for the smoothness.
As to what radius this is, I have no idea
To me so long as the curve is smooth it'll do just fine.
Using radius dish is a faster and no-brainer method but involves too much dust.
Using this method ensure the back is smooth curved but each back is not exactly the same; there will be some minute differences in the curvature.
Good or bad you decide but for me this is good.
The side braces are saw to length, filed and sanded (no sharp edges); the splinter are pretty sharp.
The lining is notched to accept the side braces.
Luckily I spent sometime sharpening my chisels the other day, they are a pleasure to use now.
After that I didn't glue the side braces as it was a rainy day and this spells trouble gluing at high RH especially for cross bracing.
I had another idea this time round is to add a centre vertical brace supporting the back brace to the LTB.
It's sort of like the sound post on the violin but different in the sense it does not impede vibration which mainly at the lower bout.
I am thinking of either 2 or a single sound post support.
But anyway this idea is not fixed yet if it does it'll probably be removable.

Trimming the lining

Checking the smooth curve for the back.

Notching the lining / dentellones for the side braces.

Sides braces notches done, the side braces are temporarily taped to the sides. It's not a tight fit to allows for some expansion

Side braces inletting done.

Weight of side braces 273 g. Need to include the 2 supporting the 3rd back brace which is 44.6 g. They add up to 317.6 g.

Some preview pic of the assembly

Another view

Another view.

With the back

The sound post idea I was mentioning earlier. The main idea was to make the upper bout a very stiff structure so that the lower bout can concentrate in producing the sound. This is with 2 supporting post.

Similar idea with single post. Likely the post will be a removable feature in the event that it doesn't work out sonically, it can remove easily. Anyway during gluing time these post will be very help in supporting the back brace.
20151204
I finally get a chance to glue the side braces.
Not much tricks here just apply glue and clamp.
I also fill up the space around the LTB and UTB.

Preparing to glue the side braces

Clamping the side brace

All glued
20151206
The side braces all dried.

Look of the box; more or less ready or closing

Another view

The side braces tend not to be too visible. I usually prefer some contrast