20131111
Finally the assembly process shall start!
First I glued the patch to the top.
After the glue has dried, I then drill holes to align the top and the neck block.
I use a wood dowel for the alignment.
After the glue has dried I saw and then plane the excess dowel away
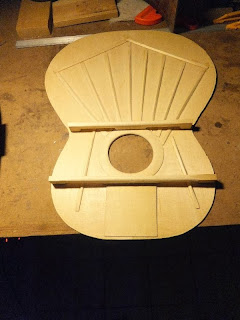
Next I place every part into the solera all ready for assembly.
As a precaution, I do a dry run to ensure I perfect know where to clamp.
Once the weather clears up I will be all set for gluing of the lining.
The patched is glued. This patch is because I cut the rebate on the neck block too deep.
I glued a cross-grained patch on the top to close up the gap between the neck block and top.
Also a cross-grain patch will add strength to prevent cracking especially at this part of the guitar which s prone to cracking.

Checking the alignment by sight.

Drilling alignment holes.

Heating up the gluing surface

All set to glue with glue applied on both surface

Glued

Clamped

Saw away the protruding alignment dowels.

Plane and sand smooth the surface.
20131113
I had a dry run of the assembly process.
I noticed that it's whenever I did a dry run I will make less mistakes.
Whenever I just do it straight from memory I often make mistakes which I have have never seen before.
So I thought I give it a go and hopefully any potential problem will surface before the real thing.
Anyway I try to clamp tail block to the 2 sides' end and held the sides in place with spring clamps
Boy those big A-clamp are very strong... I had problem even to open it.
Had to resort to use 2 hands in order to pry it open.
Anyway these few days is rainy and the RH is too high for comfort around 78% or so.
I might have to wait till next week to get a lower RH and with the dehumidifier I can drive it down comfortably.

All set to assemble (dry run)
20131115
Well originally I checked the weather forecast the north area won't be having rain but...
As I started halfway the assembly process, the sky turned darked and it rained a while later.
Anyway I started the assembly process.
The sides are position in place for the assembly and I started to glue the end block.
Before gluing I give it a nice planing for a fresh surface.
After the end block is glued and clamp I started with the lining.
I asked my friend whether he will be going for wide purfling but he didn't really answer my question.
In the end I just bite the bullet and use a normal 6mm wide kerfed lining.
This should give an allowance of a 4mm wide purfling max.
After the lining is glued, I clamp it tight with sticks extending down.
I fired up the dehumidifier and hopefully it's powerful enough to reduce the RH in the room.

Applying glue to the end block

Glued and clamped.

Lining glued and clamp for lower bout

All the lining glued and clamped.

Another view
20131118
After the glued dried I remove all the clamp and enjoy the view of the assembled guitar.
Actually 1/2 assembled since the back is not on yet.
After I removed the assembled body from the mould, I gave it a few taps on the top.
It sounded quite nice though I have no reference really.
Then I began to shape down the rim.
I have about 15mm to plane down as I forgot to cut out the excess before I bend.
Anyway with the plane it only take a while.
I use my radius block to check the shape.
Once it's near the final shape I will glue some sandpaper and sand it.

Shaving down the sides

Look at the shavings

Checking the shape with the radius stick

Can see the shape from this angle.

Almost done.

The front side.


