20130426
I glued the braces to the back and start the process of closing the box.
Marking where to glue was definitely a problem.
I started with the center brace, marking where it should glue and glue it.
After that I apply some hide glue to the 1st back brace in the body and close the box onto it.
After some time when I lifted the back the 1st brace come off with it.
I heated with some hair dryer to reactivate the glue and clamp it properly.
After both glue are more or less set, I did the same with the 3rd brace (LB)
Unfortunately this back brace fits tightly to the pocket and doesn't want to come off when I lifted it.
I had to glue according to the glue mark.
After the glue dried, I try fitting into the box and it was quite well fitted.
Except the LB brace was skew to the sides, and I had to trim the ends a bit.
Now I notice the back was off center by a bit, I choice to adjust the brace or the pocket, so I chose to adjust the ends of the braces.
I also shape the cross-section of the braces.
Well the back is almost done, I had to glue some finger brace to complete the active back design.

Gluing the center back brace.

Gluing the UB 1st back brace in the body to mark the position.

After that take out and glue properly with clamps.

Similarly for 3rd back brace (LB) but this one has a problem it's pretty tight in the pocket so I had to estimate where to glue based on the glue mark.

After the glue dried.

Check the fitting. I had trimmed the ends of the 3rd back braced a bit to make it go in.

Shapping the brace cross-section profile.

Close up cross-section profile

3 Back braces done. I will glue in some finger braces at the LB to complete the active back design.
20130429
I glued the finger braces for the back to complete the active back design as per Trevor Gore.
I did shape the finger brace for a slight curve on my radius stick.

The finger braces prepared.

Radius the bottom of the brace a bit

Glue the finger brace

After the glue dried

Carving the finger brace

Carved

Glue the sound hole reinforcement
Just use simple weight will do the trick. The base is teh radius stick to impart a slight curve on the back lengthwise
20130515
The box is closed.
The procedure is pretty much the same as previous closing.
But I did do a dry run before carrying out the actual one.
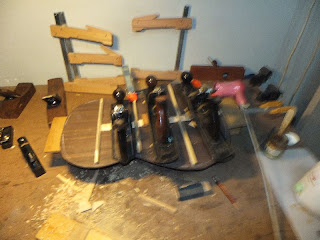
I applied the hide glue to the rims and heat it up with the hair dryer and close the box and apply the clamps.
It was quite fast work; but with the dry run everything worked out smoothly.
Following that, I trim the edge overhang and check out the resonances.
The main top resonance was nice and so was the main back but the main air was higher than I expected.
This was attributed to the wider dentellones I used for this build.
I trim the rim thickness a bit and it drop a few Hz but I can't bring it near my target of G#2.
It remain as A#2 for now.

Preparation for closing

Heating up the rims

Glued and clamped

Trim the overhang