20140401
This is not an April Fool's joke.
I have began the process (finally)
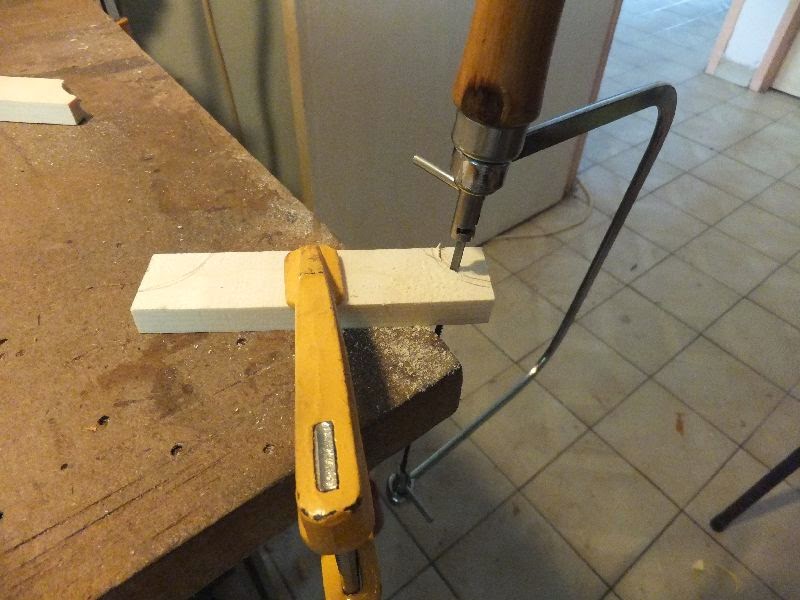
First I marked the position of the center brace onto the sides
When I close the box I transfer the marking onto the back (outside surface).
Then I lift the back up and transfer the marking to the inner (gluing) surface.
Then I also marked the center line on the brace and back itself.
Now I have the necessary marking in place.
I applied the hide glue and clamp making sure the brace is aligned properly to the marking.
I start with only one brace 1st so that I can make adjustment for the other 2 braces.

Close the box and mark the position of the brace onto the sides and then transfer to the back.

Transfer the mark from the outside surface to the inner one (gluing side).
Mark the center line on brace and back.

Apply hide glue

Glue and clamp making sure the position is correct.
20140403
After the centre brace is glue I fitted the back once again to check the alignment.
As usual the alignment was out by a little.
But a little adjustment to rotate it and it was back to centre.
The last time I did on #3, I glued 3 back braces all at once and the alignment was out (as usual).
The difference is I had to adjust 3 braces and that was hard.
Now I glued one at a time the adjustment was much simpler.
I began to glue the lower bout back braces.
After it dried, I check the alignment and this time the alignment was surprisingly on without any adjustment.
So I began to shape the profile of the back brace.
I tapped and listen to the back and the tap tone was now much better with the braces on.
I also cut 4 radial brace for the active back and glue it radially to the centre of the lower bout.
I preshape the profile of the radial brace as it's hard to reach in with the main back brace blocking the access to the radial brace.
For the upper bout brace I glued it to the main body instead.
This is because the brace is also supported by the foot.
This formed a very rigid upper bout structure.
I also prepared and glue the back seam reinforcement from cut-off of the spruce top.
The section between 1st and centre back brace is now yet covered with the reinforcement.
My friend had an idea to carve the label with laser etched label so the label will act as an reinforcement.
So with that I will leave it blank for now.
Also another reason is that I don't know the exact location of the 1st back brace until the back is on so I will only glue it once the back is assembled.
I will glue thru' the soundhole.
The last section will need to be removed due to the presence of the end block.
I measure the thickness of the end block and remove the section accordingly.

Gluing the lower bout back brace

Preparing to glue the upper bout back brace to the main body

Upper bout back brace glued.

Profiling the back braces.

Hollow the center section to increase the flexibility of the active back.

Length wise profile of the LB back brace.

Preparing the base of the radial back brace.

Saw away the ends

Shaped with a sander

Glued.

Preparing back seam reinforcement

Applying glue

Glued and clamped on the radius stick to impart some curvature.

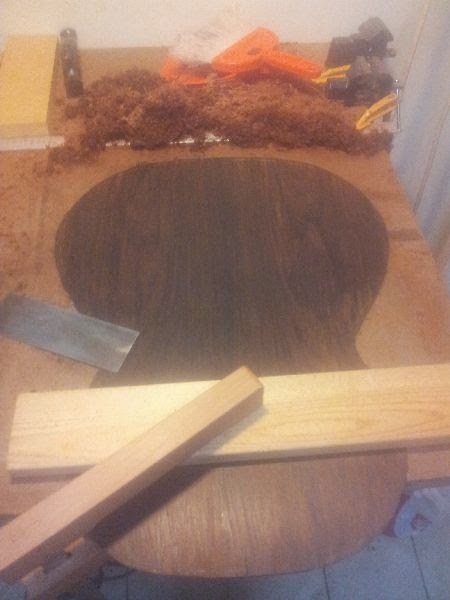
Back almost done.

Marking the section to be removed. This section is covered by the end block

Saw the mark

Chisel away the section

Done

Last look before I close the box

The back
20140408
I still have some bits and pieces to clear before closing the box.
I glued an additional side brace at the other side of the veneer backing for the sound port.
Also I reshape the back radial brace as I felt it was way too thick.
Anyway after shaping it, the tap tone sounded quite good to my ears.
I shall be taking a recording of the back before I close the box for future reference.
However, it will not be truly representative as one patch of the seam reinforcement is missing and one brace is missing.
But I guess it'll make a good enough reference with respect to the lower bout.

Chisel away a porting of the upper lining to inlet the side bracing.

Similar for the lower lining

Glue and clamp the side brace

Re-shaping the radial brace

All done!
20140410
The box is closed!
I had a dry run before I do, making sure there is enough clamp and enough block to spread out the pressure.
After that I applied the hide glue and put on the back and start the clamping process.
With everything at hand the process was smooth.

Dry run to ensure all the tools are at hand

One last look before I close the box

Applying the glue to the rim and heating with hair dryer

Another view

The clamps are on

View from top.
20140410
There clamps were removed and I sealed up the edges and check the resonance.
The resonance points are well within my expectation; they are very similar to my #1's.
I was expecting the main air resonance T(1,0)1 to be lower though since I make the depth deeper and the internal volume is larger.
Anyway the values are still good.

Box closed clamps removed

Trimming the overhang with my small MJF plane. It's very handy for this purpose.

Trimming the overhang done!