Custom Search
Showing posts with label Neck Angle. Show all posts

2011-01-12

Thickness Measurement Tool

Thickness Measurement Tool
I started to make a frame for the electronic thickness dial gauge which I bought from Rockler.
At first I was thinking of sawing a U-frame out of a plywood but I noticed I had quite a lot of excess pine blank which I can use.
So I decide to make a frame out of the scrap pieces of pine that I had.
But after gluing up I noticed it wasn't as rigid as it should, so I added an aluminium piece to strengthen the structure.
Well the Al piece did work.
After adding the Al piece, the throat is about 30 cm.

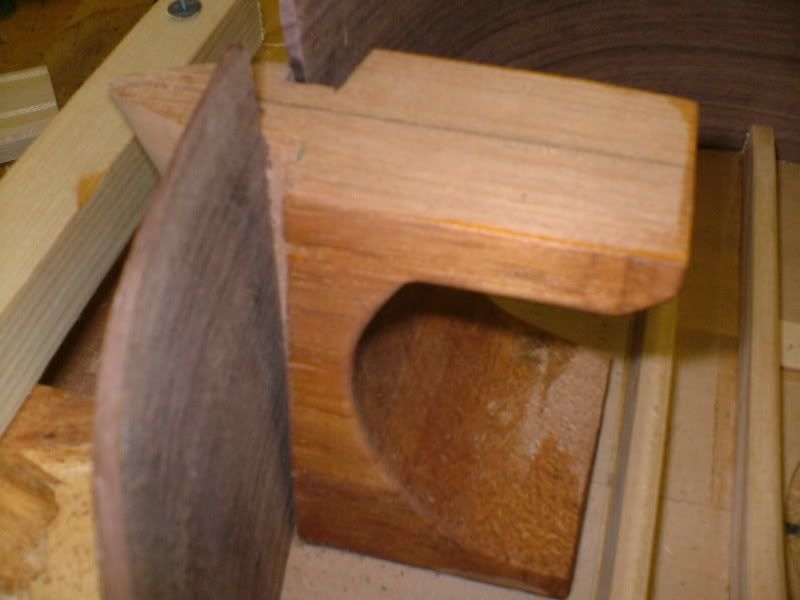
Next I managed to scoop a depression to fit the dial gauge's fixture.
Finally I would need to glue a extension to touch the bottom of the dial gauge's needle.

The bottom nut is done.
I simply mark where the dial gauge needle would be and drill a 6mm hole.
Enlarge the bottom side to accommodate the T-nut.
But I didn't manage to knock the T-nut all the way in.
After screwing in the bolt, I also file the top of the bolt flat and rounded at the edges and smoothen with sandpaper.

Clamping the fixture

The dial gauge almost done.

Gluing the end piece for the extension to touch the needle

Aluminium piece to strengthen the rigidity of the frame.
The thickness measuring tool done.

Close up shot

Added the bottom adjustable screw.

Beneath is a T-nut. On top is a normal nut to lock the height.

The side view


Readjusting the neck angle and relief of Guitar #1
My guitar #1's geometry wasn't good at all.
Due to the too forward neck angle, the action at the treble side becomes too high.
Also the relief at the bass side is too straight for at the 2nd fret region.
So I decide to remove the frets and plane away some finger board at the head end to correct the angle.

At first removing the fret seems really daunting.
But I muster the courage and try on the 1st fret.
Surprisingly the fret comes off pretty easily.
Unfortunately it also chips at the tang area.
But luckily I am going to remove some fingerboard so the chip part will be removed.
After planing, scraping sanding, I visually check the curve and adjusting until I think it looks right.

Then I also plane more curvature at the 2nd fret region to correct the relief for the bass side.
After that I knock back the frets and try. Voila!
The bass finally doesn't buzz.
But I did create some buzz at the 5th string around the 4th fret region.
Then I think it due to the nut should be easily fixed.
Overall now I am more confident to doing a re-fret job.
Removing the frets

Scraping to smoothen the surface after planing

I also did something to the solera please read the solera post.

2007-06-25

Some building consideration details

I have not been working on the guitar for a month or so.
Recently I have been thinking about the spanish heel construction; something which I did not particularly favour.
I was thinking more in terms of a mortise and tenon joint fasten on by bolt and nut.
The particular advantage of this method of construction:
1) It allows the neck and body to be work on separately.
Particularly when it comes to installing the fret wire or french polishing the body
2) It allows to adjust the neck angle after assembly. Spanish heel construction there is no way to adjust the neck angle.
That's why a solera is essential in spanish heel construction; it is to built the neck angle into the solera so that the correct neck angle is maintained during assembly.

Romanillos advocate a different method of construction for the Spanish heel.
The neck angle is only fixed at the time when the back is closed.
Instead of 2 narrows slots to grip the sides at the traditional Spanish heel, the slot is widen into a ramp slot.
At the time of the back closing, a wedge is driven into the ramped slot to hold the correct neck angle in place.
This method allows the final neck angle to be adjusted.

Here is a picture of the Romanillos method of construction.
This particular pic is a construction by an amateur luthier RCoates


Neck Angle
Neck angle is the angle where the neck of the guitar makes with the plane of the top board of the guitar.

With forward angle, the neck plane is above the top of the top board of the guitar.
This will cause the saddle to be low, which is essential in flamenco guitars.
However, take note the too much forward angle will cause in determining the saddle height.
The saddle need a certain minimum height and the neck angle cannot be below this minimum height or else the the action at 12 fret would be too high for comfort.

Backward angle will cause the saddle to be high.
An example of extreme backward angle is violin family of instruments.
You can see that the cello's bridge/saddle is a few inches tall.

Zero Neck angle:


Forward neck angle: You can see that the saddle height is reduced.


Backward neck angle: You can see that the saddle height is increased.


NB: the effect of neck angle has been exaggerated to illustrate the difference better. Typical neck angle is very minute in terms of 1 or 2 mm differences at the nut.

See the picture of a Andrea Amati cello from Cremona, it clearly shows the effect of an extreme negative neck angle on the bridge.


Neck Relief
Neck relief is the amount of curvature built into the fingerboard to allow the string to vibrate without hitting the fingerboard.

...