
20160531
I have received a Baroque guitar for repairs.
The guitar was damaged in an accident and the back was crushed with some damage to the sides.
The head was snapped from the neck.
So I was asked to examine the guitar and possibly restore the guitar as close to the original as possible.
Upon examination I would say the guitar is quite repairable.
Though the back was crushed on one side, I would say it's definitely repairable.
The neck was using V-joint and glued with hide glue so the break was virtually clean at the joint.
So no damage to the head/neck joint.
The back's damage looks pretty bad but all the pieces should be inside the body itself so think should able to glue back nicely.
The side's damage is minimal.
The only problem is how to remove the back with out removing the binding...

Damage to the back

Head snapped cleanly from the neck

Slight damage to the sides

Closeup of the damage to the back.
One piece is "missing" (inside the body actually)

The back crack extend all the way to the upper bout.
After much consideration and some advice from the owner's luthier friend, we both agreed that removing the back is the way to go.
So I proceed to remove the back, but with the binding blocking the access to the back/ side seam, it's virtually impossible to remove the back.
So I had to remove the binding first but weren't able to make retain the binding.
Well, no worries though, I have some spare cut-off which can be use for binding.
First I had to remove the binding to expose the back / sides seam.
After exposing the seam I can heat up the joint and insert the palette knife to separate the back and sides linings.
I did it slowly over a few sessions actually.
The hard part was a the brace joining the sides.
The braces sit in a lining pocket but didn't budge.
In the end I manage to lift up the back slightly and insert a 2mm chisel to chisel away part of the brace ends.
Anyway, I had to replace the back braces since it broke as the back was crushed.
Another hard part is at the heel area.
But after much heating and inserting I manage to dislodge the back from the heel.
Luckily the heel area is pretty small.
That makes me ponder the next time I (or some other repairer) need to remove my guitar's back, how to do it?...
Anyway that's another thought next time.

Another view of the back crack

Close up of the main damage.

Removing the binding

Inserting the palette knife between the back and side lining.

Heating the glue joint before inserting the palette knife.
There is a wetted paper towel underneath the iron.

Removing the binding at the heel area

Almost done removing the back.

Alas the back is removed.
Here's a look of the interior

The broken back
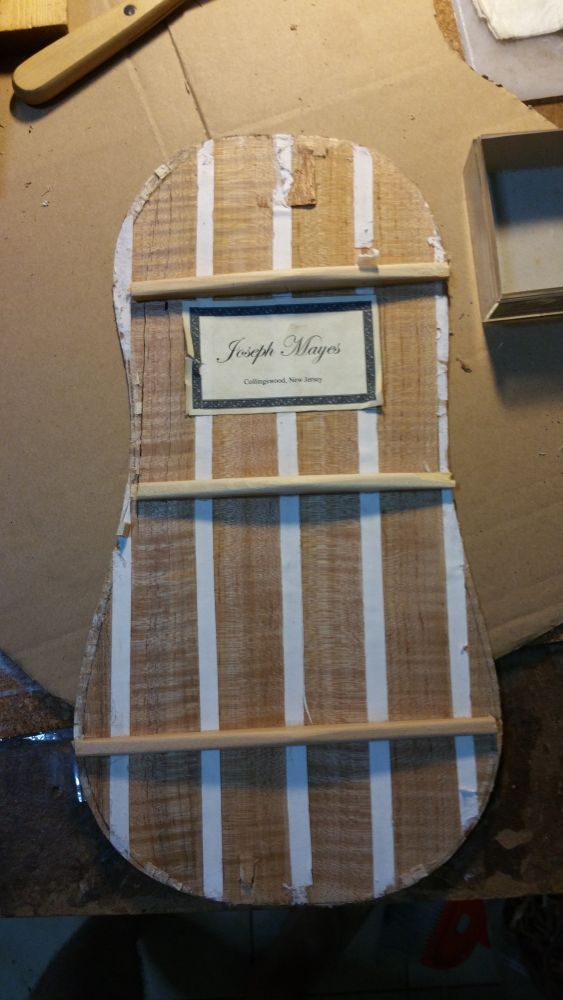
All pieces are there.
20160606
Next I proceed to glue up the back.
I am using hide glue as per tradition but also because of it's property
It's easy to heat and reglue without the need to remove the previous glue remnants.
After gluing I used clamps to hold the back together.
I will be gluing reinforcements at the inside once the glue dries.

Gluing the back together again.

Clamp to make sure the crack joint is closed properly.
20160610
I clean up the neck / head V-joint.
Though I believe the original glue used was hide glue, still I better clean the joint to get a clean surface.
Also, I tried to correct the head angle as it was slanted a bit.
In the end I didn't correct much as it will result in a major operation instead.
The fit was better now with less gap between the head and neck.
I could have glued the joint but decide against it.
The owner wanted to reshape the head for a more symmetrical look so it will be easier to work on the head separately.
Then I proceed to glue in the reinforcement for the crack seam.
I use a maple veneer which fits the back maple material.
The shape was a little bent due to the force of clamping tight the gaps, so I clamp 2 plastic to straighten the back.
I also applied glue to the cracked sides.
I noticed that the shape as gone out of shape a bit so when I glue in the back I need clamp the sides a bit to correct the shape.
I also sand away the paper backing for the rose area at the request of the owner.

Clamping the back straight and adding reinforcement maple veneer strips for the crack.

Cleaning the head / neck

Sanding away the paper backing for the rose

Mostly sanded.
20160726
It's been a while since I last work on this.
I was busy with my #9 and one other guitar repair.
Anyway I remove those spoilt lining and re-glue those lining blocks.
Also I check the back braces in fact more of the back braced are OK
I just need to extend the lining block to accommodate the braces.
Also I clean away the glue remnants for the lining block
The previous glue used was white glue and not hide
I guess back operation needs longer open time and hence the luthier used white glue instead.
For me it's all hide glue unless those cosmetic gluing.

Removing those broken lining block

Reglue back the lining block

Another view
20160912
I finally closed the back for the baroque guitar.
I also shaped the head to make it more symmetrical.
Also when I shaped the neck head joint I had an accident.
I was careless...
I was holding the head piece and chisel the joint for better fitting, the chisel slip and cut my thumb and plunged into my hand.
Luckily the plunged wasn't deep but the thumb was cut pretty badly...
(However, the plunge did more damage to my guitar playing as I can feel the weakness in the ring finger after the accident.)
I went to see doc and had the wound washed and bandaged.
Anyway I need to remember the hand is not a clamp...

One last look before closing the box.

Closed the box with cam-clamps

Shaping the head and chiselling the neck/head joint.

Cut accident! The thumb was cut pretty badly and the chisel also plunged into the palm.

Aftermath of the accident...
20160923
My binding stock has arrived.
The walnut colour looks closer to the original than my existing rosewood stock.
And walnut is easier to bend.
Now ready for the binding process.

Getting ready for the binding process.
20161017
I managed to bind the body.
I was waiting for my stock of walnut bindings to arrive but when I try to bend the binding they broke...
There were too much run-out in the binding.
Then I use my current stock of IRW and they end up fine!
After that I use tape and rope to glue the binding to the body.
This body was much easier to bind than classical guitars
Before gluing the bindings, I had to reduce the height by quite a bit as they were too tall.
If too tall during the binding process the rope / tape will pull it skew and not sit square to the slot.
So I glue using hide and tape as I go along.
After all is done, I use rope to tighten the binding.
When the glued dried I removed the rope and levelled the bindings using block plane / scraper and sandpaper.
After that I remove all the previous finish using scrapers and sand the surface to be ready for finish.
But before finish I better glue in the head first.

After bending the bindings. The walnut stock all broker due to run-out. This is IRW.

Gluing the binding

1/2 done, doing the other half.
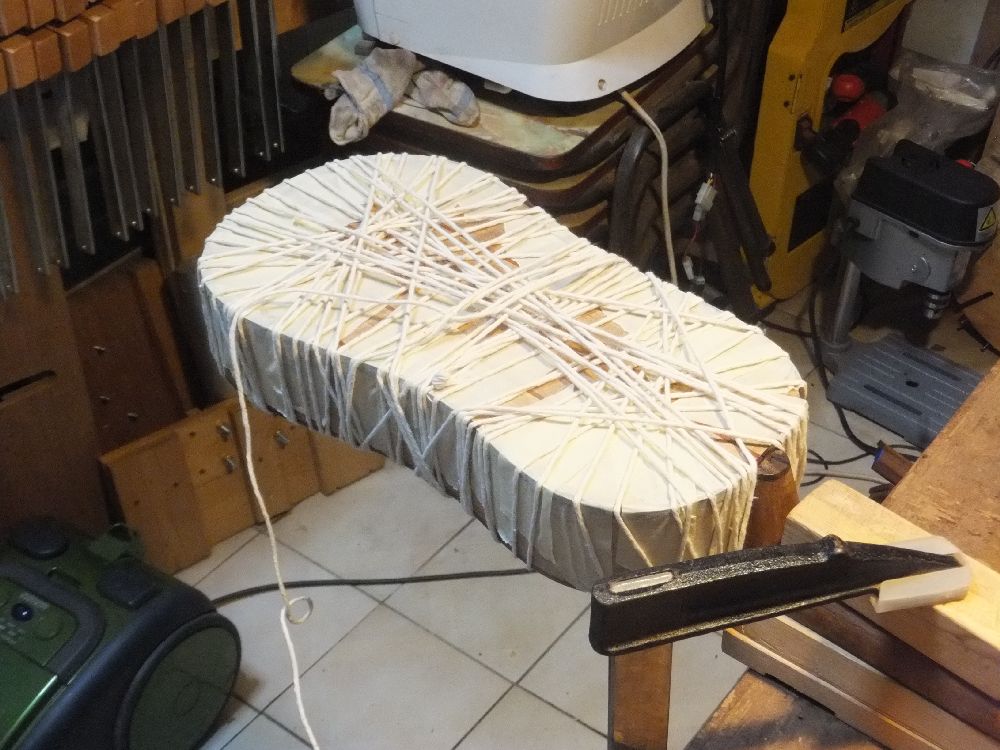
All done and roped.

Planing down the binding using block plane

Levelling using scraper

Sanding down the finish to prepare for new finish.

Sanding done - sides

Sanding done - back

Sanding done top.
20161021
I finally glued in the head.
The V-joint wasn't really well done so I parred the joint for a better fitting.
After that I check the fit and started the gluing process.
I have to make a caul for the clamp to hold as the angle of the head is different from the neck.
This caul will enable the clamp to be in line with the head and thus able to exert pressure correctly.
I also started to dissolve some shellac for the FP after that.

Mixed up some shellac for the finishing

Parred the joint for better fit

Head glued to neck and clamped. The caul is on the neck and has the same angle as the head so that the clamp can exert pressure correctly.
20161028
The head is fully secured.
Actually I am quite surprised by the result.
The joint is tight now, there used to be some gaps in the head / neck joint.
Unfortunately I don't have the picture to show this part.
Now it's tight especially the part where the V mortise sits on the triangular tenon's shoulder.
I also corrected the skew in the head.
Now it's parallel to the neck.
But I need to widen the nut slots as a result.

Close up on the V-joint now the joint is tight.

The part where the head mortise sits on the triangle tenon's shoulder. Now it's closed up.

Front view

Back view

Nut slot done.
20180308
I began to apply the finish to the backs.
I am using dark blonde shellac.
Look at the nice orange hue.

Nice orange hue.
Some more progress.
The orange hue is really nice.
As I had used brush to brush on the shellac, the look and feel of the finish is like a violin.

The finish starting to look good.

Further finishing

The orange golden hue is looking very nice

Almost done.