
I decided not to install the frets first because I don't know if the relief I plane into the fingerboard is enough or not.
So after I string up I can roughly determine if I need to plane somemore or not.
So I proceed to glue up the bridge instead.
Another reason is that I can't wait to hear how it sounds...
For gluing of the bridge, I have decided to use hide glue for the mainly because of the organic nature of the glue and because it is reversible.
To prepare the hide glue, I use my digital scale and weigh out 10 grams of hide glue
and then weight 19 grams of water.
The ratio of 1:1.9 is stated in the instructions that comes with the purchase of the hide glue granules from LMI.
I use warm water mainly to dissolve the the hide glue granules.
Note that the water should not be above 60 degrees Celsius.
After that I continue to maintain the temperature using a baby food warmer. (Very handy)

Hide glue in the baby food warmer

From the top view.
Preparation of the Bridge for Gluing
After that I proceed to measure the exact location of the bridge.
The scale length is 650 mm; so at the 12th fret (1/2 of the scale length) is 325 mm
I further marked the center line of the bridge this will be in line with the center line of the joining seam of the topboard.

At the nut area (650 mm)

At 12th fret (325 mm)

At the bridge (0 mm)
Gluing of the bridge
Then I proceed to gluing.
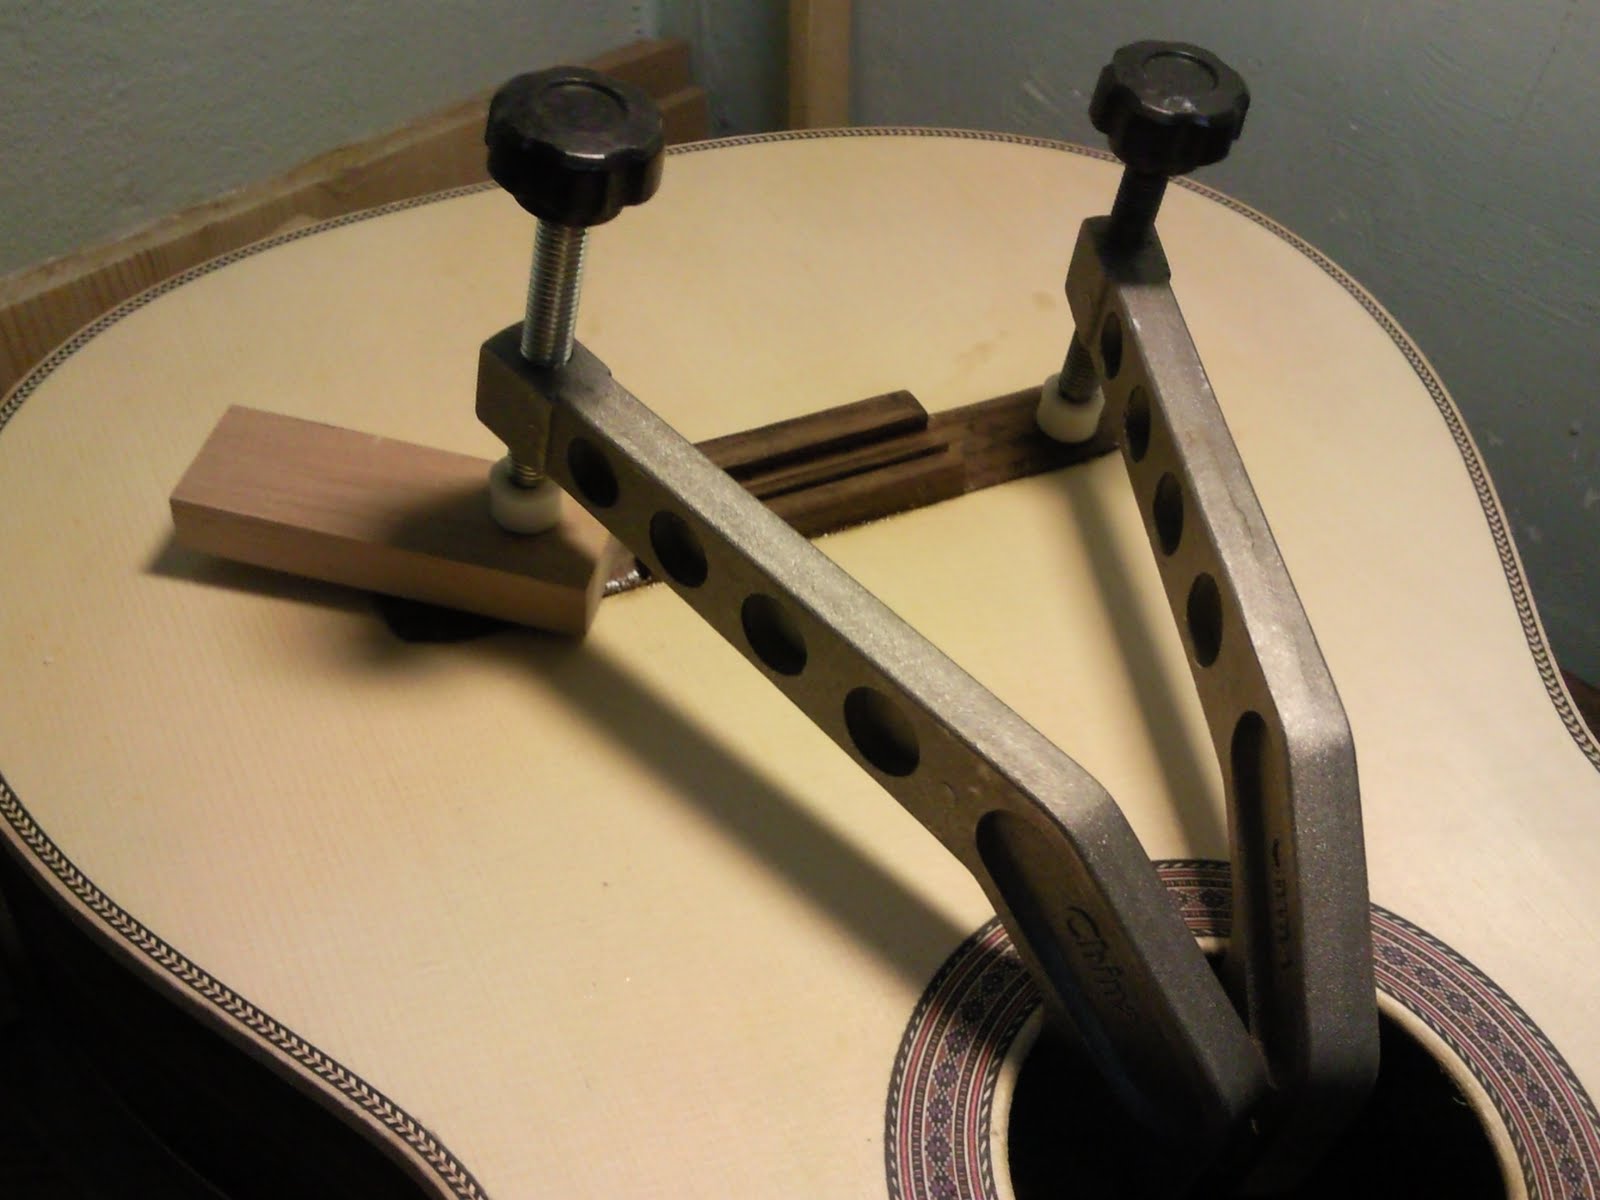
Firstly I put the caul in place 1st but had some problem because my tape wasn't that sticky and also I had problem reaching in the guitar thru the sound hole.
(I thoughy my hands are small enough...)
Then I heated up the parts first in order to prolong the open time.
Hide glue also known as Hot hide glue (HHG) is a liquid at 60 degree Celsius.
However as it cools, it will gel into a crytalline solid and bond the 2 parts together.
So in order to apply the glue and prolong the open time, the surface must be heated up.
(Open time is simply the time which the glue remains liquid so that you can work at the pieces to be glued. E.g. applying the clamps, repositioning the bridge around etc...)

Installing the caul

Heating up the top board

Heating up the bridge.
Then I quickly apply the glue using a brush and press it down onto to topboard.
I reconfirm the position of the bridge using the metre rule.
I held onto the bridge until it starts to sets and finally apply the clamps and leave it overnight.
Well this process isn't as smooth as I though I had to redo it a number of times.
Fortunately, hide glue is easily clean up just need some hot water will do the trick.
Finally I did managed to get it clamped.

Clamping by hand using the rubbed joint method.
Applying the clamps in place.

From the top view

Close up view

From behind
Well let's wait till I get the clamps off and string up for the 1st time...
Clamps off!
Excitedly I took the clamps off after 1 night of clamping.
The bridge looks sturdy enough so I strung up using J45 Composite D'Addario Normal Tension strings.
It was a used string actually not a new one.
Wow... I was blown away by the sound of the open strings.
The bass is very full much more than what I had expected.
The low D (tuned down) sounds really very full.
(Remember I haven't hammer in the frets yet.)
Originally I plan to fine tune it like scraping the region behind the bridge to get more bass etc or lower the height of the back braces etc...
Now it doesnt really seem very necessary to do so.
Then I took out my Alhambra 4P (made in Spain by Alhambra factory) and compare the sound...
For the 4P, the sound seems to be trapped inside the box, whereas my guitar sound like the sound just keep on oozing out of the box.
Then I put some metal wires to simulate the frets and test out the treble.
D# seems abit dead with less sustain than the rest the rest of the high notes.
Well what I have gathered so far is that the sustain will likely to improved over time.
Let's hope so.
Now to hammer in the fret first.

18 hole bridge looks much neater.

Looking down from the nut

My guitar.

Close up
Set up
I measured the height at 12th fret, it's abt 5 mm at both treble and bass side.
This won't do.
Taking away the 1mm for fret height I am left with 4mm each which is still too tall.
The ideal is abt 3mm on the treble and 4mm at the bass.
I measure my bridge which is abt 9mm in height and measure the Alhambra's bridge height which is about 8mm.
So physically I got about 1 mm to shave off the bridge, one big concern is that will it change the sound that I have heard?
One other way to so shave off at the fingerboard region.
After all my neck is pretty thick, should have some excess to shave off.
I finally decided to shave off the nut region of the fingerboard on the advice of Mike Collins, an experienced and very helpful luthier from the OLF
I managed to reduce the setup by another 0.5 mm at the 12th fret.
I think the rest can be adjusted by the nut and saddle.
So after that I decide to proceed with the fretting.
Fretting
I consulted the declamp.net forum about how to do the fretting.
My luthier friend Alexandru Marian (from delcamp / OLF) gave me very good advice on how to do a fretting.
(He is a new luthier but build really good sounding guitars in the Torres style)
Also another helpful UK luthier Michael P Nalysnyk remind me important points to take note while doing the fretting.
Such helpful advice from all the friendly luthiers in the declamp forum.
Here's the thread on the discussion on fretting which I raised.
The question that came into my mind is whether to trim the tang (the slot part of the fret that fits into the slot) at the ends or not.
My fingerboard did not have any bindings so trimming the tang isn't that necessary.
The only possible problem is that the fingerboard might shrink and the tang exposed.
Then refiling the frets will be needed.
So I decided to go without trimming the tang.
Some things to take note:
1) The fret slot is deep enough for the tang.
2) The fret sits properly in the slot.
3) Use a hardwood to transfer the blow of the hammer to the fret to avoid denting it.
I tried the fretting on a scrap piece of wood and then start doing the frets
So far so good.
Hopefully I can finish the fretting soon.

Trying on a scrap piece of wood

Another view.

Sawing the fret slots deeper to ensure the tang can sit fully into the slot

Tapping in the frets to straighten in and also to align the frets

Hammering in the frets with wood to spread out the pressure
I continue with the rest of the fretting.
The inner part of the finger board is a big problem.
Now I got to hold a piece of wood to support the knocking so I can't use a block of wood on top.
Instead I use a smaller piece of wood to support the knocking.
Well I can't help but hammering on my poor thumb at times...

Supporting below and hammering the frets at inside the body

Frets so far. All seems to sit well into the slots

Using a smaller wood to support the knocking. (Not really necessary actually)
Then I made a mistake
During the 19th fret, as I was hammering, the fret got twisted.
When I pull it out to redo, I chipped off a section of the finger board...
So I use CA glue (super glue) to glue back the chip and continue with a fresh fret.

Twisted fret with the chip-off

The chipped off part

Gluing back the chipped off part

All frets done

Trimming off the excess protruding part

Filing the edge for the protruding frets / tangs

All done.

The trimmed off fret ends.
Checking the levelness of the frets
To check the whether the frets are level or not, I use a credit card (EZLink card - our standard transport card in SG) to check for 3 frets at a time.
Make sure the card doesn't rock on the central fret.
So I started with 1st 2nd 3rd fret and then move 1 fret down to 2nd 3rd and 4th and then 3rd 4th 5th and so on.
As we get closer to the body, the fret distance reduced.
So I turn the card and use the other shorter edge to check instead.
I do noticed that some frets are not hammered in properly.
Once they are hammered in properly, not much adjustment is needed.

1st 3 frets. Make sure it doesnt rock on the central fret. Then move on to 2 3 4 and then 345 and so on.

As we go toward the body, the fret distance reduced. So I turned and use the shorter edge of the card to check.

Near the 12th fret region.
End cap
For the end cap, I want to do something different.
Also remember that my binding at this area wasn't well done at all.
(It's because I never got my useful 2mm chisel at that point of time when I did the binding channel.)
So I intend to remove part of the binding and insert with the end cap.
I was considering using the following for the endcap
1) Indian Rosewood (from sides cutoff)
2) Maple (from butt insert)
3) Ebony (from fingerboard cutoff)
After some testing, with some valuable inputs from my Mum, I decided to go for the ebony cap.
The way to deal with the binding is to notch a square notch in the bind the width of the back central insert.
Originally I wanted a triangular shape but I was beyond my skill so I went for a normal square notch.

Also I remove the cedar from the heel area using my 1" paring chisel.
The longer the chisel the easier to control the amount removed (I noticed).
Firstly I had to fit the notch before fitting the outer curves.
Getting a tight fit was a test of skills.
I use every thing in my arsenal, files sand paper etc.
But I notice the card scraper was a good tool to have.
After that I cut the rough shape of the heel foot and sand to fit again.

The end cap.

From the top.

Another view